- Jun 11, 2021
How to Start Teaching Music Lessons Online - A Mega Guide to Creating and Optimizing Your Setup
- Joseph @ Flex Lessons
- Piano Teaching
This article is a comprehensive and detailed guide on how to get started teaching music lessons online. The estimated time to read is about 30 minutes.
I have been teaching online exclusively since the beginning of 2018, although I have been offering online lessons for years before this time. For many of my students, I discovered that progress at the piano remained consistent regardless of whether or not I was sitting directly next to them in the lesson or speaking to them from a laptop. Some students practiced, some didn't, and not much changed from when I taught in-person. What did change however, was my long term strategy upon realizing this discovery.
I knew right away that I wanted to teach online exclusively, and I carefully worked to make that a reality. Within 2 years of that decision, the pandemic hit. I realized that I was uniquely positioned to deal these events, and my studio ended with many new students.
I created this guide to summarize my lessons learned, especially in dealing with technology, in hopes of helping teachers learn how to enjoy online lessons and maximize their potential.
My experience in teaching online is based off of my own passion for the merging of technology and private music instruction. I believe online music lessons should be pursued because they can be effective and open up entirely new possibilities for music teachers.
I am offering this information in hopes that teachers will discover what online lessons are actually supposed to be like, which may not necessarily be what they are already experiencing.
My previous overhead webcam setup
The main focus of this article is on setup, because some basic standards must be met for online teaching to be effective. If you can meet these standards, you'll surely find success online.
I hope you will take advantage of this information, as both you and your students will benefit significantly from getting your studio set up correctly.
With all that said, let's learn about creating a proper online studio setup!
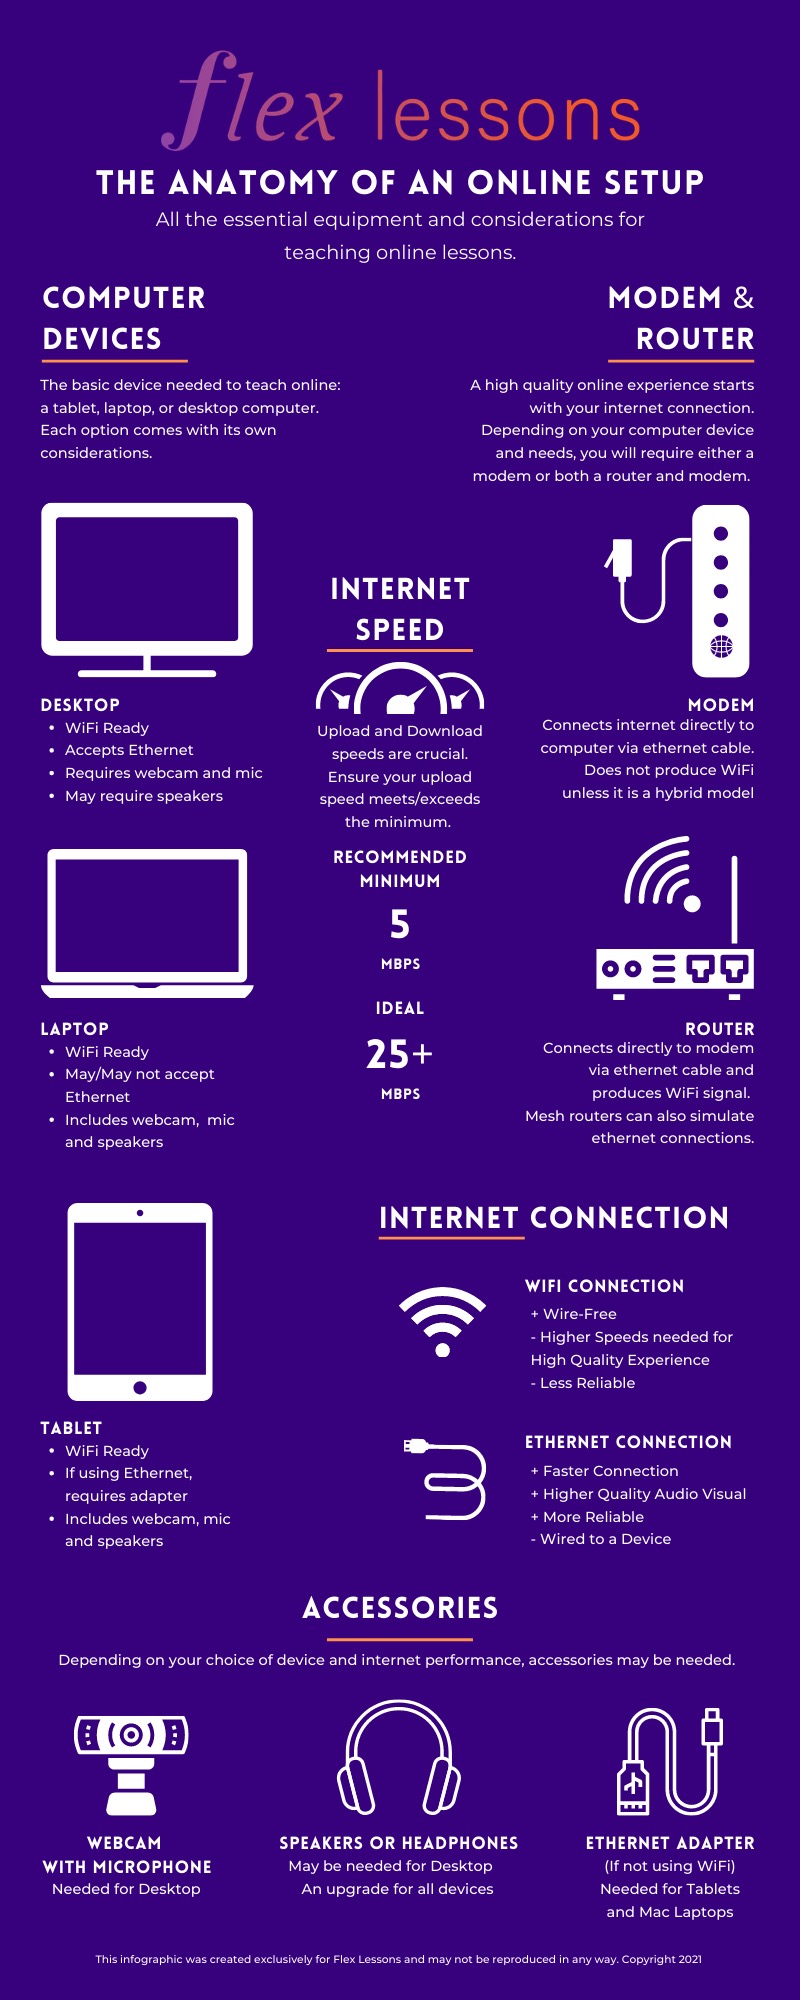
The Anatomy of an Online Setup
As it turns out, teaching effectively online is not as simple as propping up a laptop near an instrument. Although not at at all difficult, there are a few more variables involved.
Here's a visual guide to visualize the relevant components of online lessons:
The Minimum Essential Online Setup
Before we get into all the tech stuff, some emphasis needs to be placed on the importance of teaching effectively. If your studio setup is too complicated for you to manage, your teaching may not be as effective.
This guide will help you establish a minimum viable setup first, and you can expand from there as you become more comfortable. Considering how impressive and sophisticated some online studio setups can be, the minimum essential setup is quite humble by comparison. This highlights an important point: The setup does not make the teacher.
Questions to Consider:
How comfortable are you with technology?
Is your computer or tablet outdated and in need of an upgrade?
How reliable is your internet connection?
Do you know how to use Zoom or Skype or some other video calling platform?
Is online teaching a short or long term solution for you?
This setup was built after years of determining exactly what equipment would be most helpful for my particular students.
From what I have seen, many teachers get caught in the trap of feeling they need multiple camera angles, overhead webcams, and complicated mixer setups. I caution teachers worried about these details to invest in the essential minimums first, and concentrate on making their lessons flow well over the internet.
To reiterate this point, here is an example of what I started with:
Focus on being a great teacher first.
Teachers fiddling around with technology before they are comfortable with online teaching risk losing students. This is because they are distracted, making their teaching incoherent. The student will surely pick up on this and may write off online lessons altogether.
A better situation is for teachers to invest in the minimum essential setup at first and become masters at offering lessons remotely. Even after upgrades are considered, priority should always be given to simplicity and ease of use. We don’t want our tools to get in the way of good teaching.
The essential minimum hardware for online lessons covers internet connectivity, computing power, and audio/video presentation.
First Priority: Internet Speed
Your internet connection is vital to your success as an online teacher. You need both speed and reliability. On this page, we will discuss speed.
Many people underestimate the importance of a high speed internet connection when dealing with online teaching. The term “high speed” is constantly changing. Some teachers may still be paying for speeds considered extremely slow by today’s standards, because they bought “high speed” internet several years ago. I want teachers to be successful, which is why I am taking the time right here in the beginning of the guide to point out the importance of this.
If your internet speeds are too slow, if you are too far from your router, or if your modem or router is too old, then it doesn’t matter what kind of device you use for lessons because the experience will be poor quality. It also won’t matter how good of a teacher you are.
Video calls on weak connections will leave a completely different impression compared to those using strong connections.
Questions to Consider:
Do you know your current internet speeds?
Are you actually receiving the speeds that you are paying for?
Are you using an older device that may not be capable of receiving a high speed internet signal?
This router was my first upgrade when I began teaching online:
Connection speed is essential!
Music lessons over the internet must function like smooth, two-way HD videos, and students and teachers alike will instantly notice when it doesn't. The standard for a successful lesson is MUCH higher than a typical video call through Zoom or Skype. You will notice all the little hiccups and stutters when a student is trying to play a piece for you.
Here are some things to know:
Your internet speeds (upload and download) should meet or exceed 5mbps (preferably more).
Sometimes, internet service providers require you to purchase more download speed to receive higher upload speed.
Your modem and router (if using WiFi) should match the incoming internet speed.
If using WiFi, your teaching setup should be positioned as close to the router as possible.
For best results, prioritize a direct ethernet cable connection to your teaching device (more on this in the next section).
You can see your current speeds by conducting a speed test (google the words "speed test"):

Ping does not necessarily matter for our purposes.
Download speed refers to the speed at which you receive information from the web (or from your student).
Upload speed refers to the speed at which you can transmit information. This is usually the bottleneck for most people.
Be above the minimum!
The minimum requirements for Skype, Zoom, and other video clients are often lower than what I recommend, but those requirements do not ensure the best experience, especially when there are multiple devices using internet at the same time. You must factor in all connected devices when determining how much internet speed you need.
Additionally, using features such as Zoom's high fidelity audio mode or stereo mode requires even higher speeds than my suggested minimum, especially on the upload side of things.
My setup ended up requiring a modem upgrade that could handle higher internet speeds.
I should mention that the modem being the bottleneck on internet speed for online lessons is a rare thing, because these speed requirements are relatively low. However, if you choose to upgrade your internet to the 100 mpbs and above territory, your modem will likely need to be upgraded to deliver all that you pay for.
Improving Network Strength
Assuming your incoming internet speed is fast enough, and that your router and modem are capable, the next thing to look at is reducing how much your internet strength fluctuates. This is to ensure your video presentation isn’t constantly changing and freezing up.
Questions to Consider:
How far is your piano from your router?
Do you have the option of running a direct ethernet cable between your router and your teaching device?
How old is your teaching device?
Does your teaching device directly accept an ethernet cable?
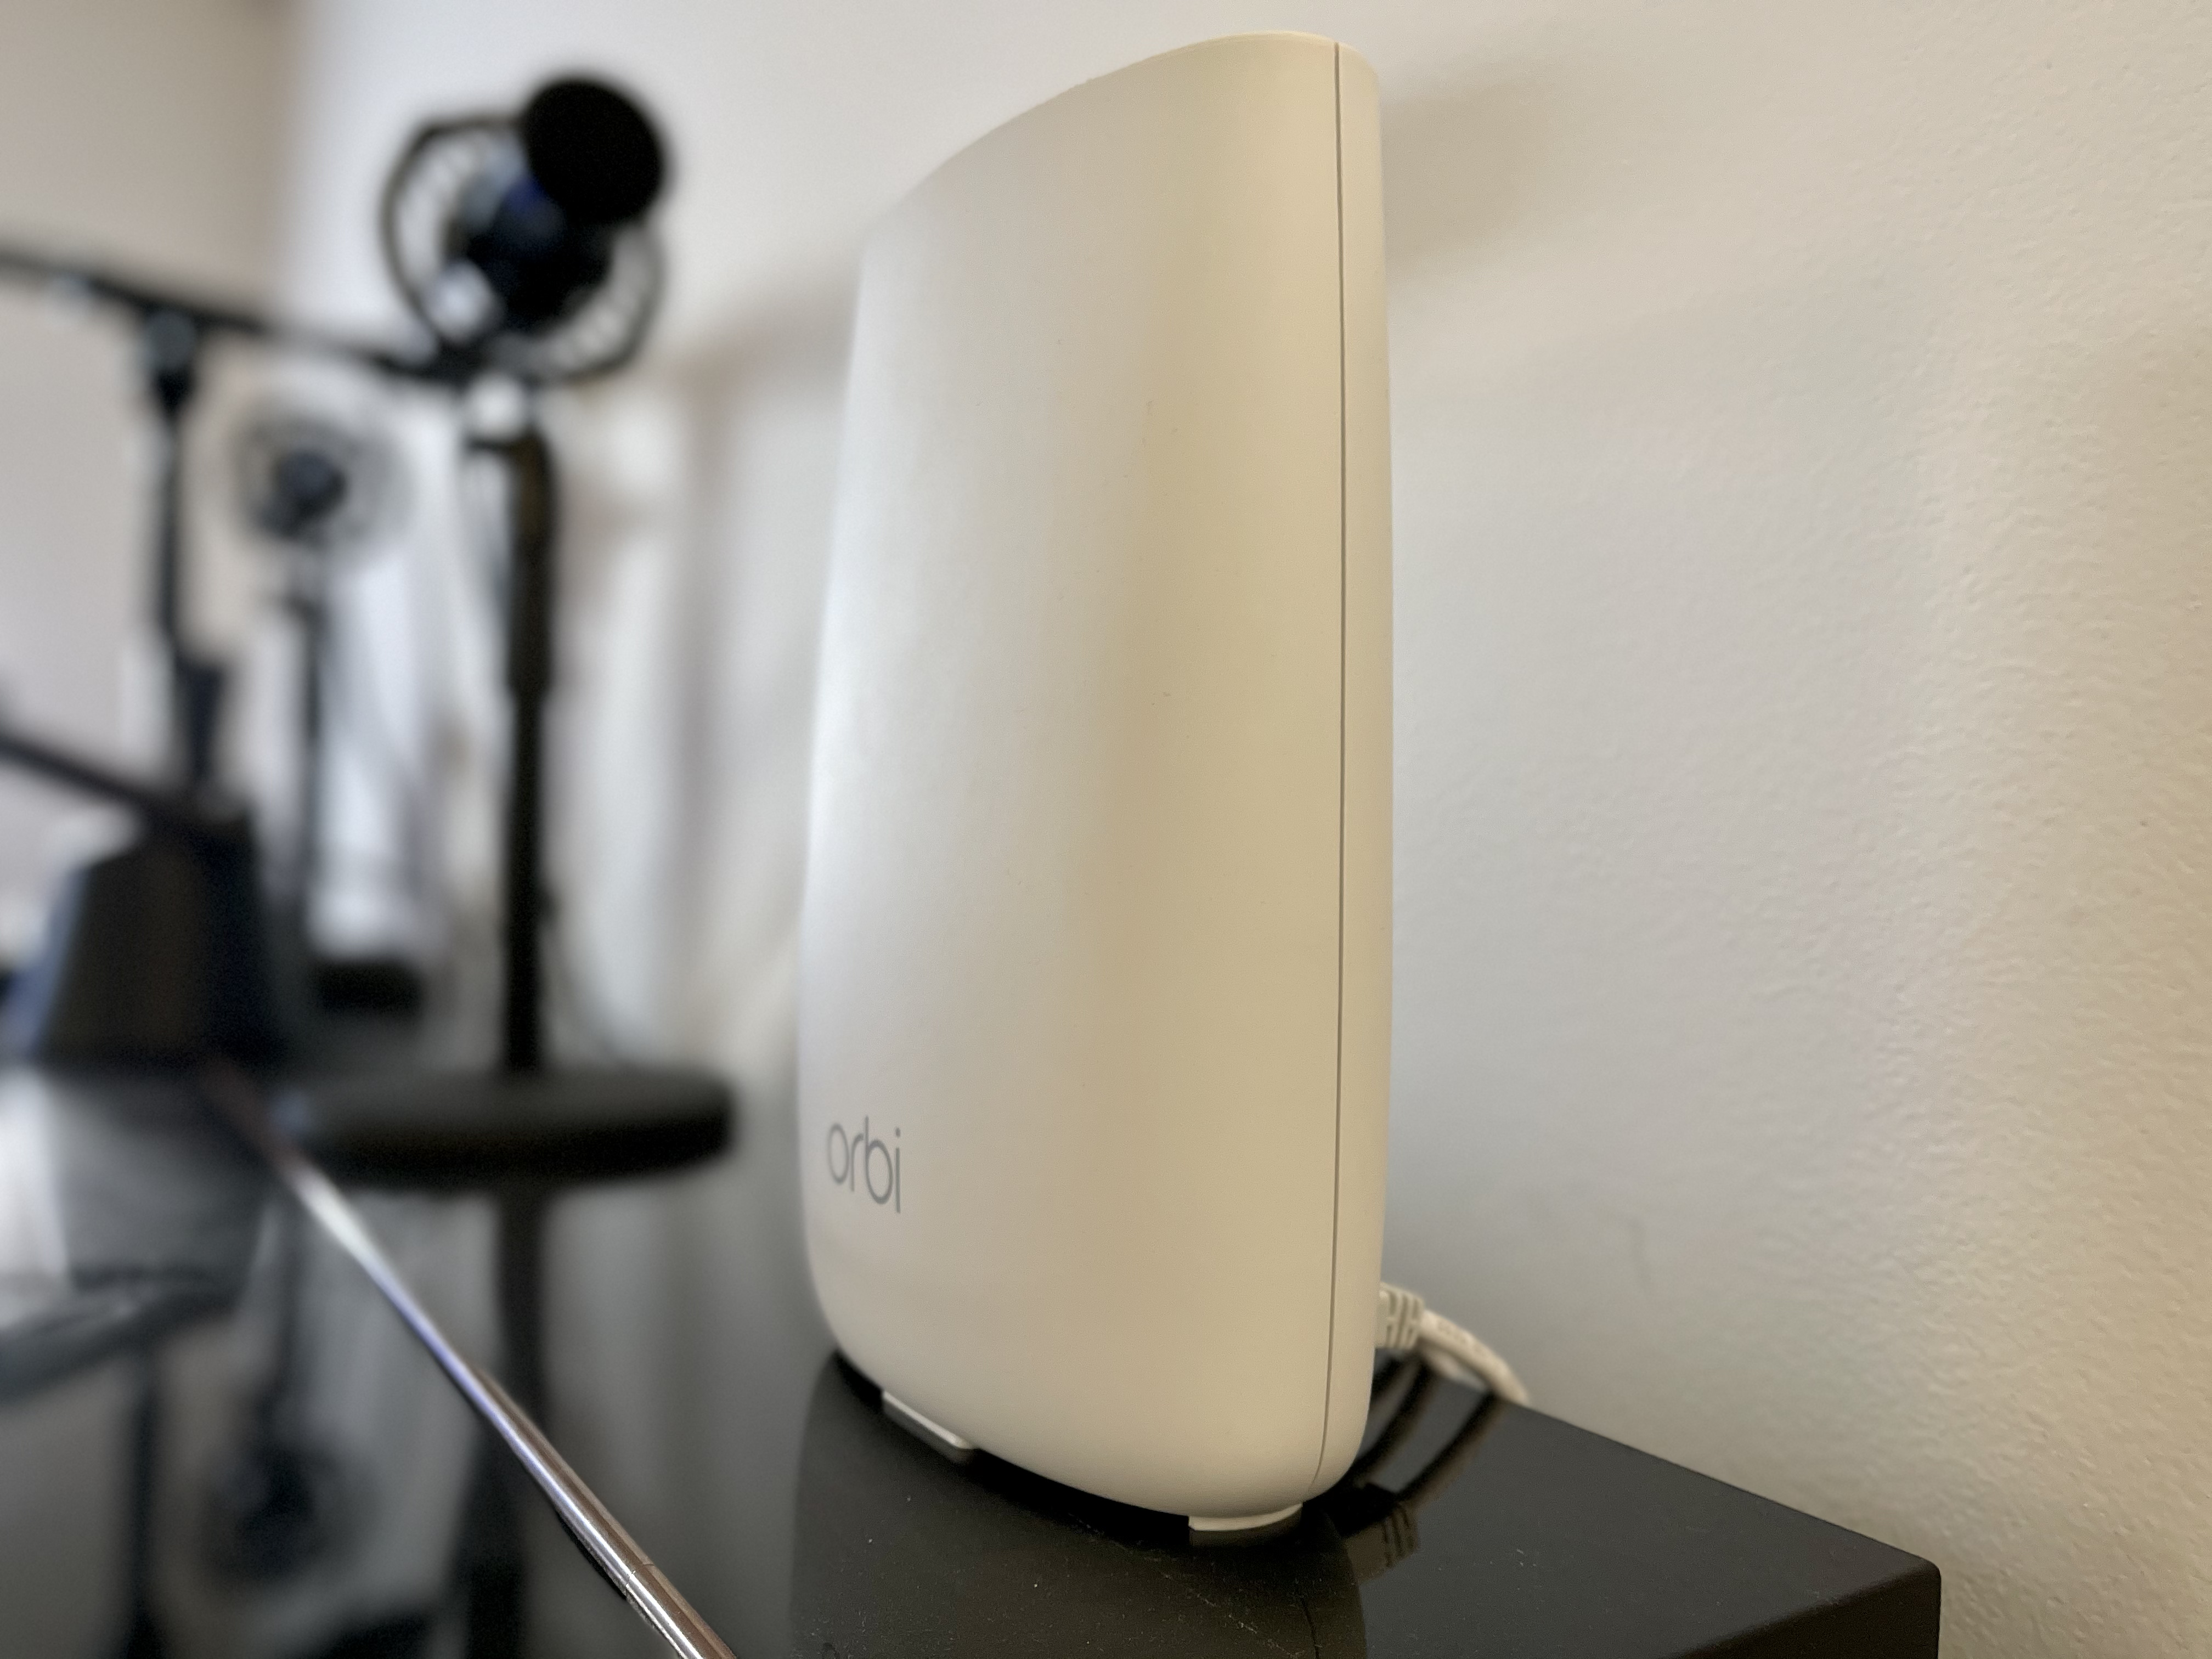
This satellite unit (Netgear Orbit) connects directly to my MacBook via ethernet cable.
The Best Option: Direct Ethernet Connection
The best way to reduce any amount of fluctuation in network speeds is to use an ethernet cable directly connecting your computing device to your router, to reduce the distance from your lesson area to your router, or to use a mesh router.
Directly connecting to your router or modem is the best option for ensuring a smooth lesson experience. If you are in the same room as your router or modem, you might as well directly connect to it. If you are using a tablet or a laptop that does not have ethernet ports, you can use certain adapters or hubs that will allow you to plug an ethernet cable directly into your device.
The Next Best Option: Mesh Network or Router With Satellite Unit
The second best option would be to use a mesh network (such as Google Wifi) or a router that communicates with a satellite unit (such as Netgear Orbi routers). These routers involve multiple units which communicate with each other in a much stronger sense than a typical WiFi connection.
Using a mesh network or a satellite unit enables you to directly connect to a network access point using an ethernet cable, or at the very least, will place you directly next to a source of WiFi signal. Either way, you will eliminate the walls, ceilings, and other interference in your network and improve reliability dramatically.
The Least Reliable Option: WiFi
If the direct line or mesh network is not an option, you will be forced to rely on your WiFi network from your router. Reducing the distance between you and your router will be necessary. This distance can be quantified in terms of actual distance as well as the amount of walls/floors that the network must pass through.
In some cases, moving the router a few feet one way or another, or rearranging the lesson space can improve network reliability significantly.
Another thing to consider here is the age of the device you intend to use for teaching lessons. Recent model laptops and tablets have modern WiFi chipsets, which enable faster and more reliable connections. Older devices typically will not receive nearly as fast or consistent of a signal. The more outdated a device is, the more necessary a direct Ethernet cable connection becomes.
Does Your Teaching Device Lack an Ethernet Port?
Many modern tablets and laptops, especially Apple notebook computers, lack an ethernet port. Luckily, you can fix this with an adapter.
Determine which ports your device has and purchase the necessary adapter to enable the connection. Common examples include USB-C to ethernet or USB-A to ethernet, etc.
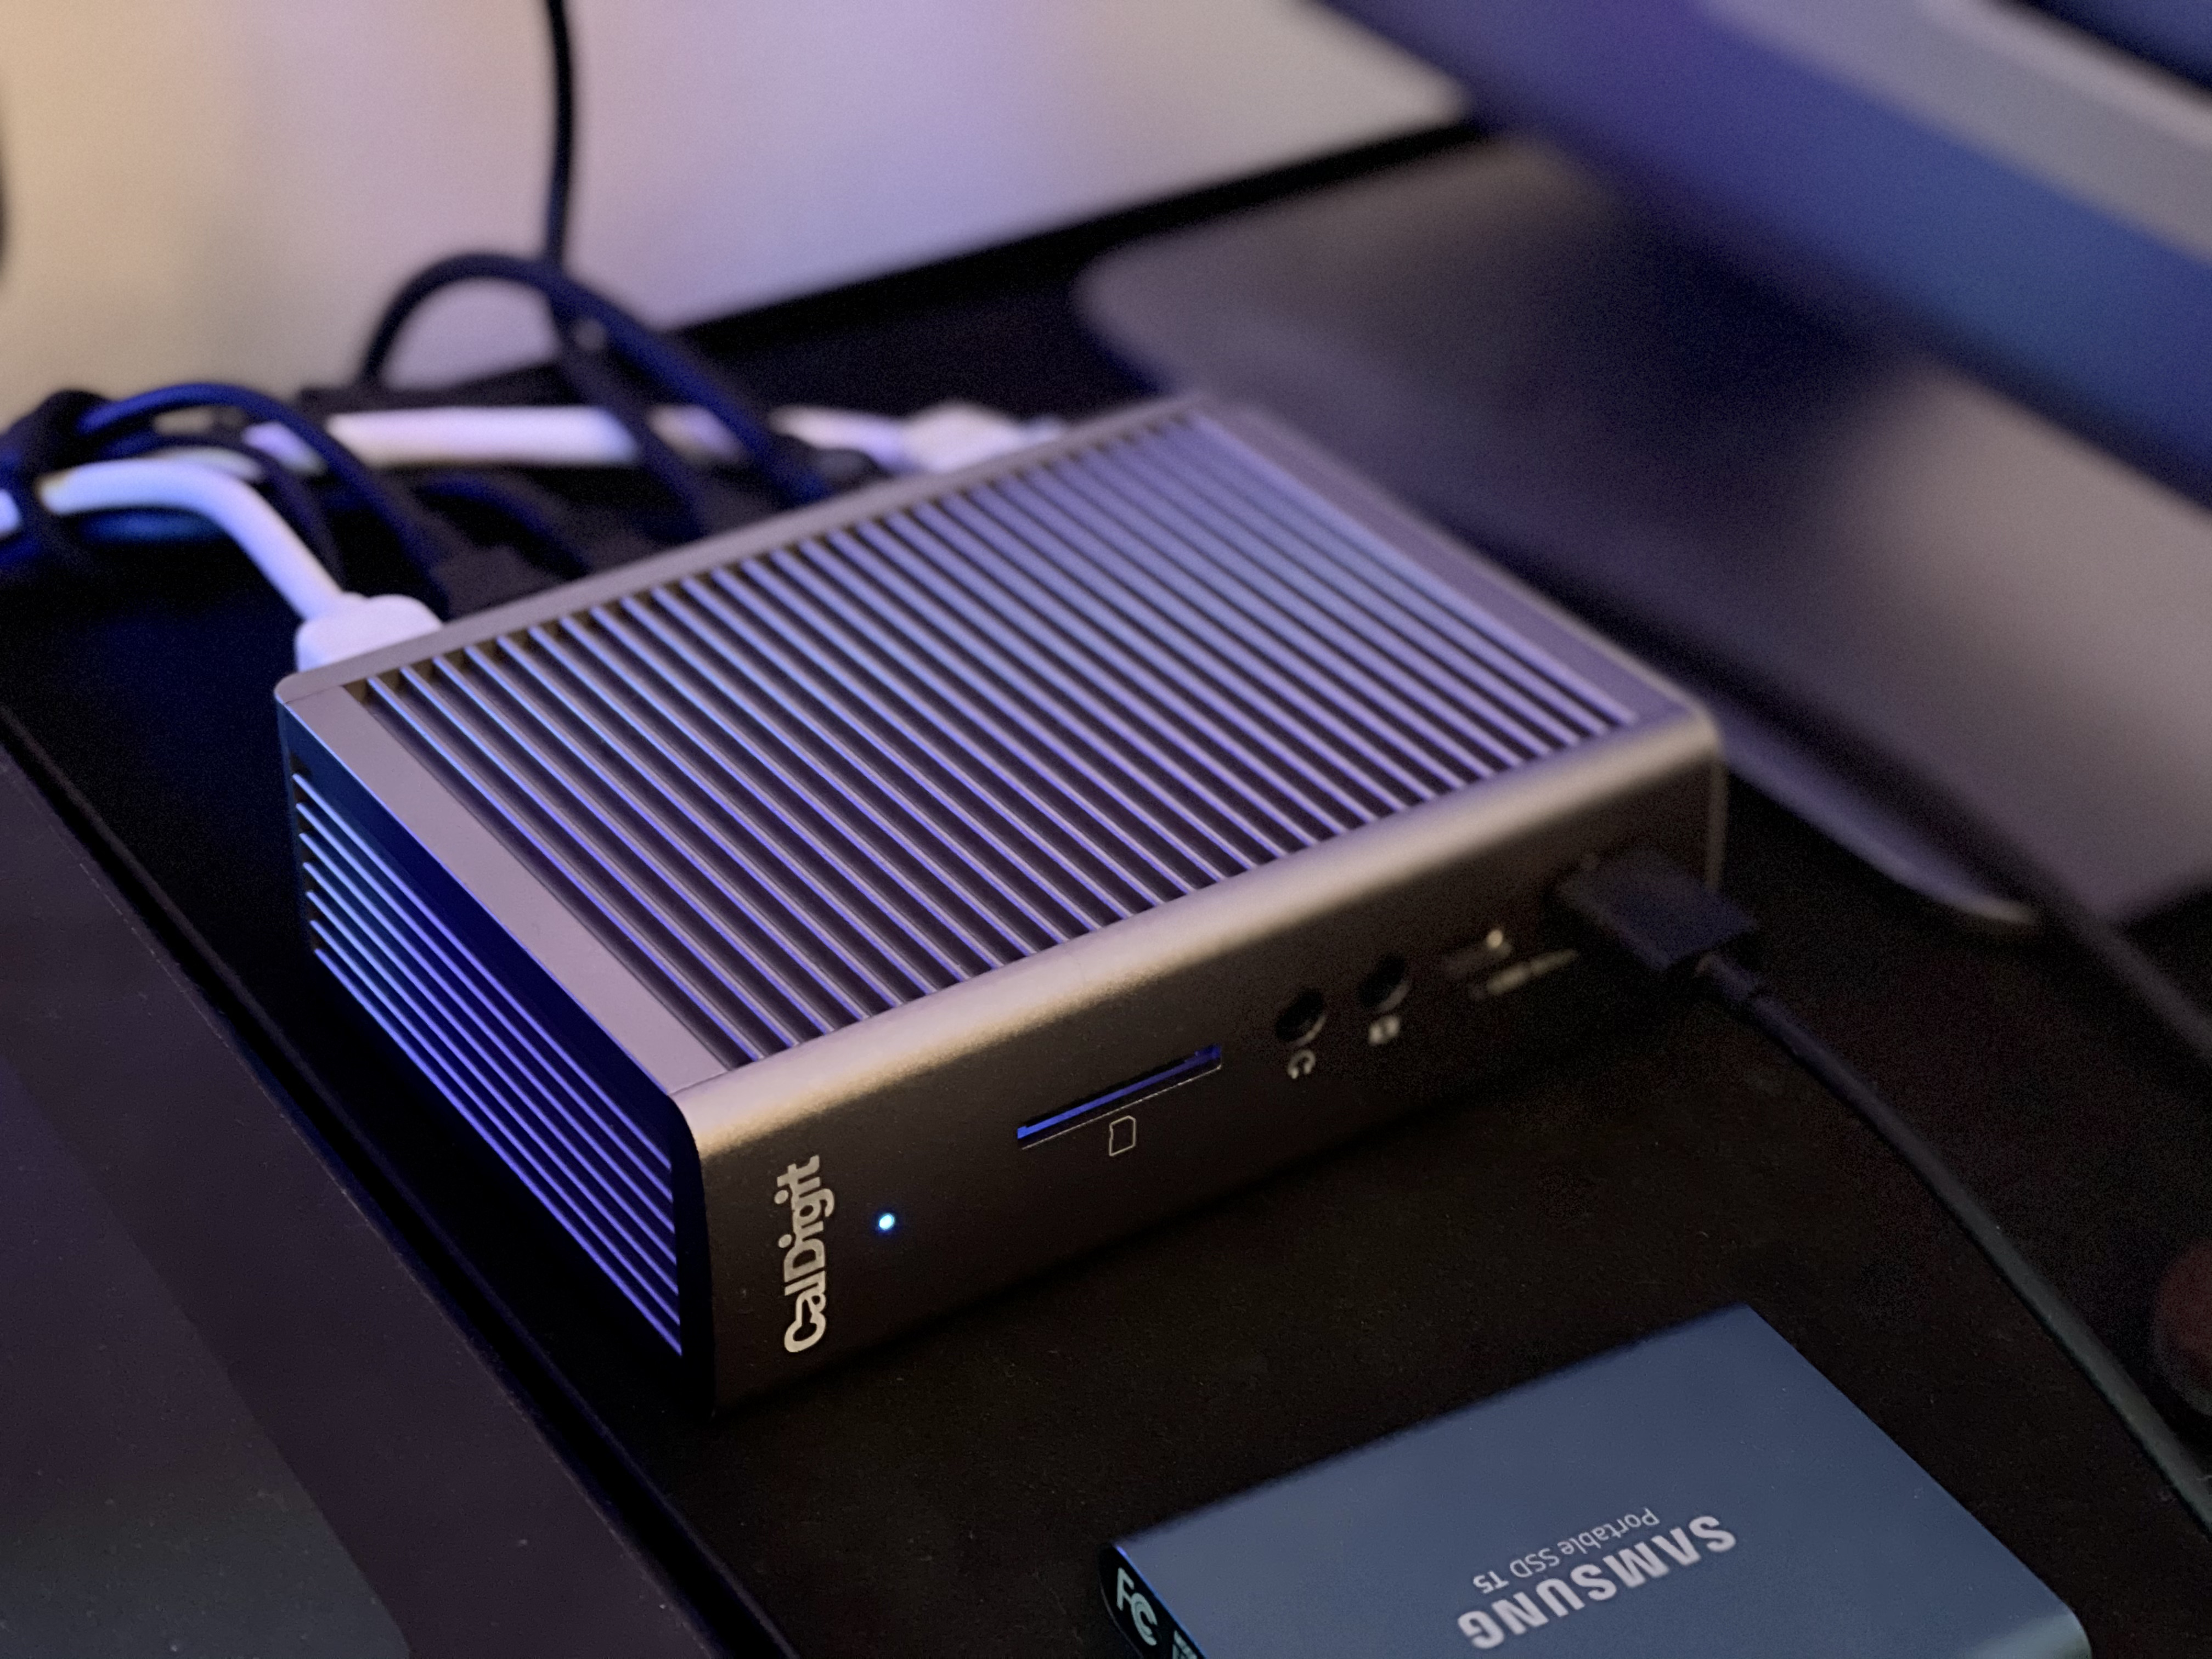
Alternatively, you could purchase a docking station that specifically includes an ethernet port. Since I am using a modern MacBook Pro, which is only equipped with USB-C ports, and I had many other devices to connect, I went with the docking station.
In this image, I am using a Caldigit TS3 dock to accept an ethernet cable into my MacBook Pro.
Ensuring proper internet connectivity and network strength is easily the most confusing and frustrating part of preparing for online lessons. The good news is that once this is secured, the rest is pretty simple.
Three Types of Online Setup Options
Once the internet is all sorted out, you will then need to focus on what computing device you will use as well as which options you may recommend to your students. Your options include a tablet such as an iPad, a laptop computer, and a desktop computer. Having something with recent hardware is important, especially if you are not directly connected using an ethernet cable. Devices more than a few years old may need to be upgraded or replaced.
Questions to Consider:
Is your current potential teaching device outdated?
Are you teaching online temporarily or as a long term solution?
Do you see yourself considering studio upgrades in the future?
Something that you should definitely keep in mind is how you may improve your setup over time, and some of these options are more limited in that respect. For students, this is a non-issue, as most students are unlikely to invest past a very basic level. However, if you are a teacher who appreciates the concept of online lessons, you will likely want to improve your setup over time, and so you must begin with the end in mind.
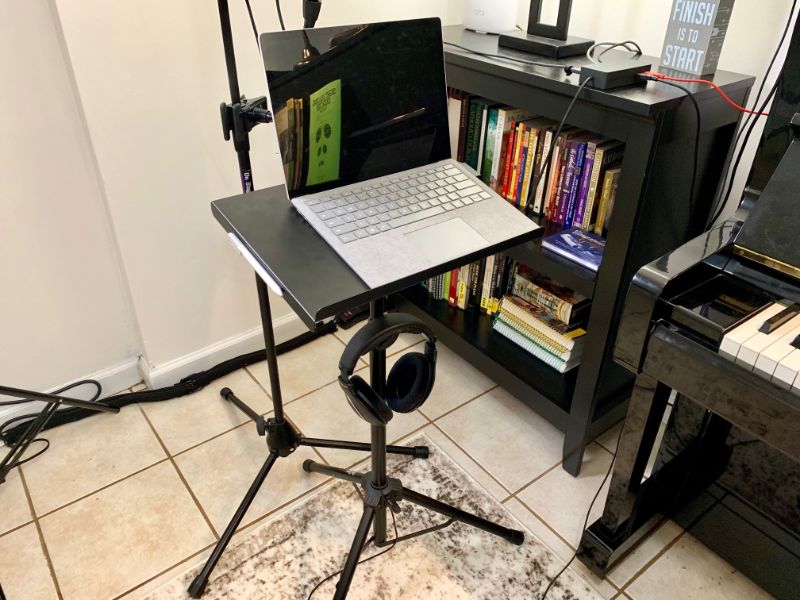
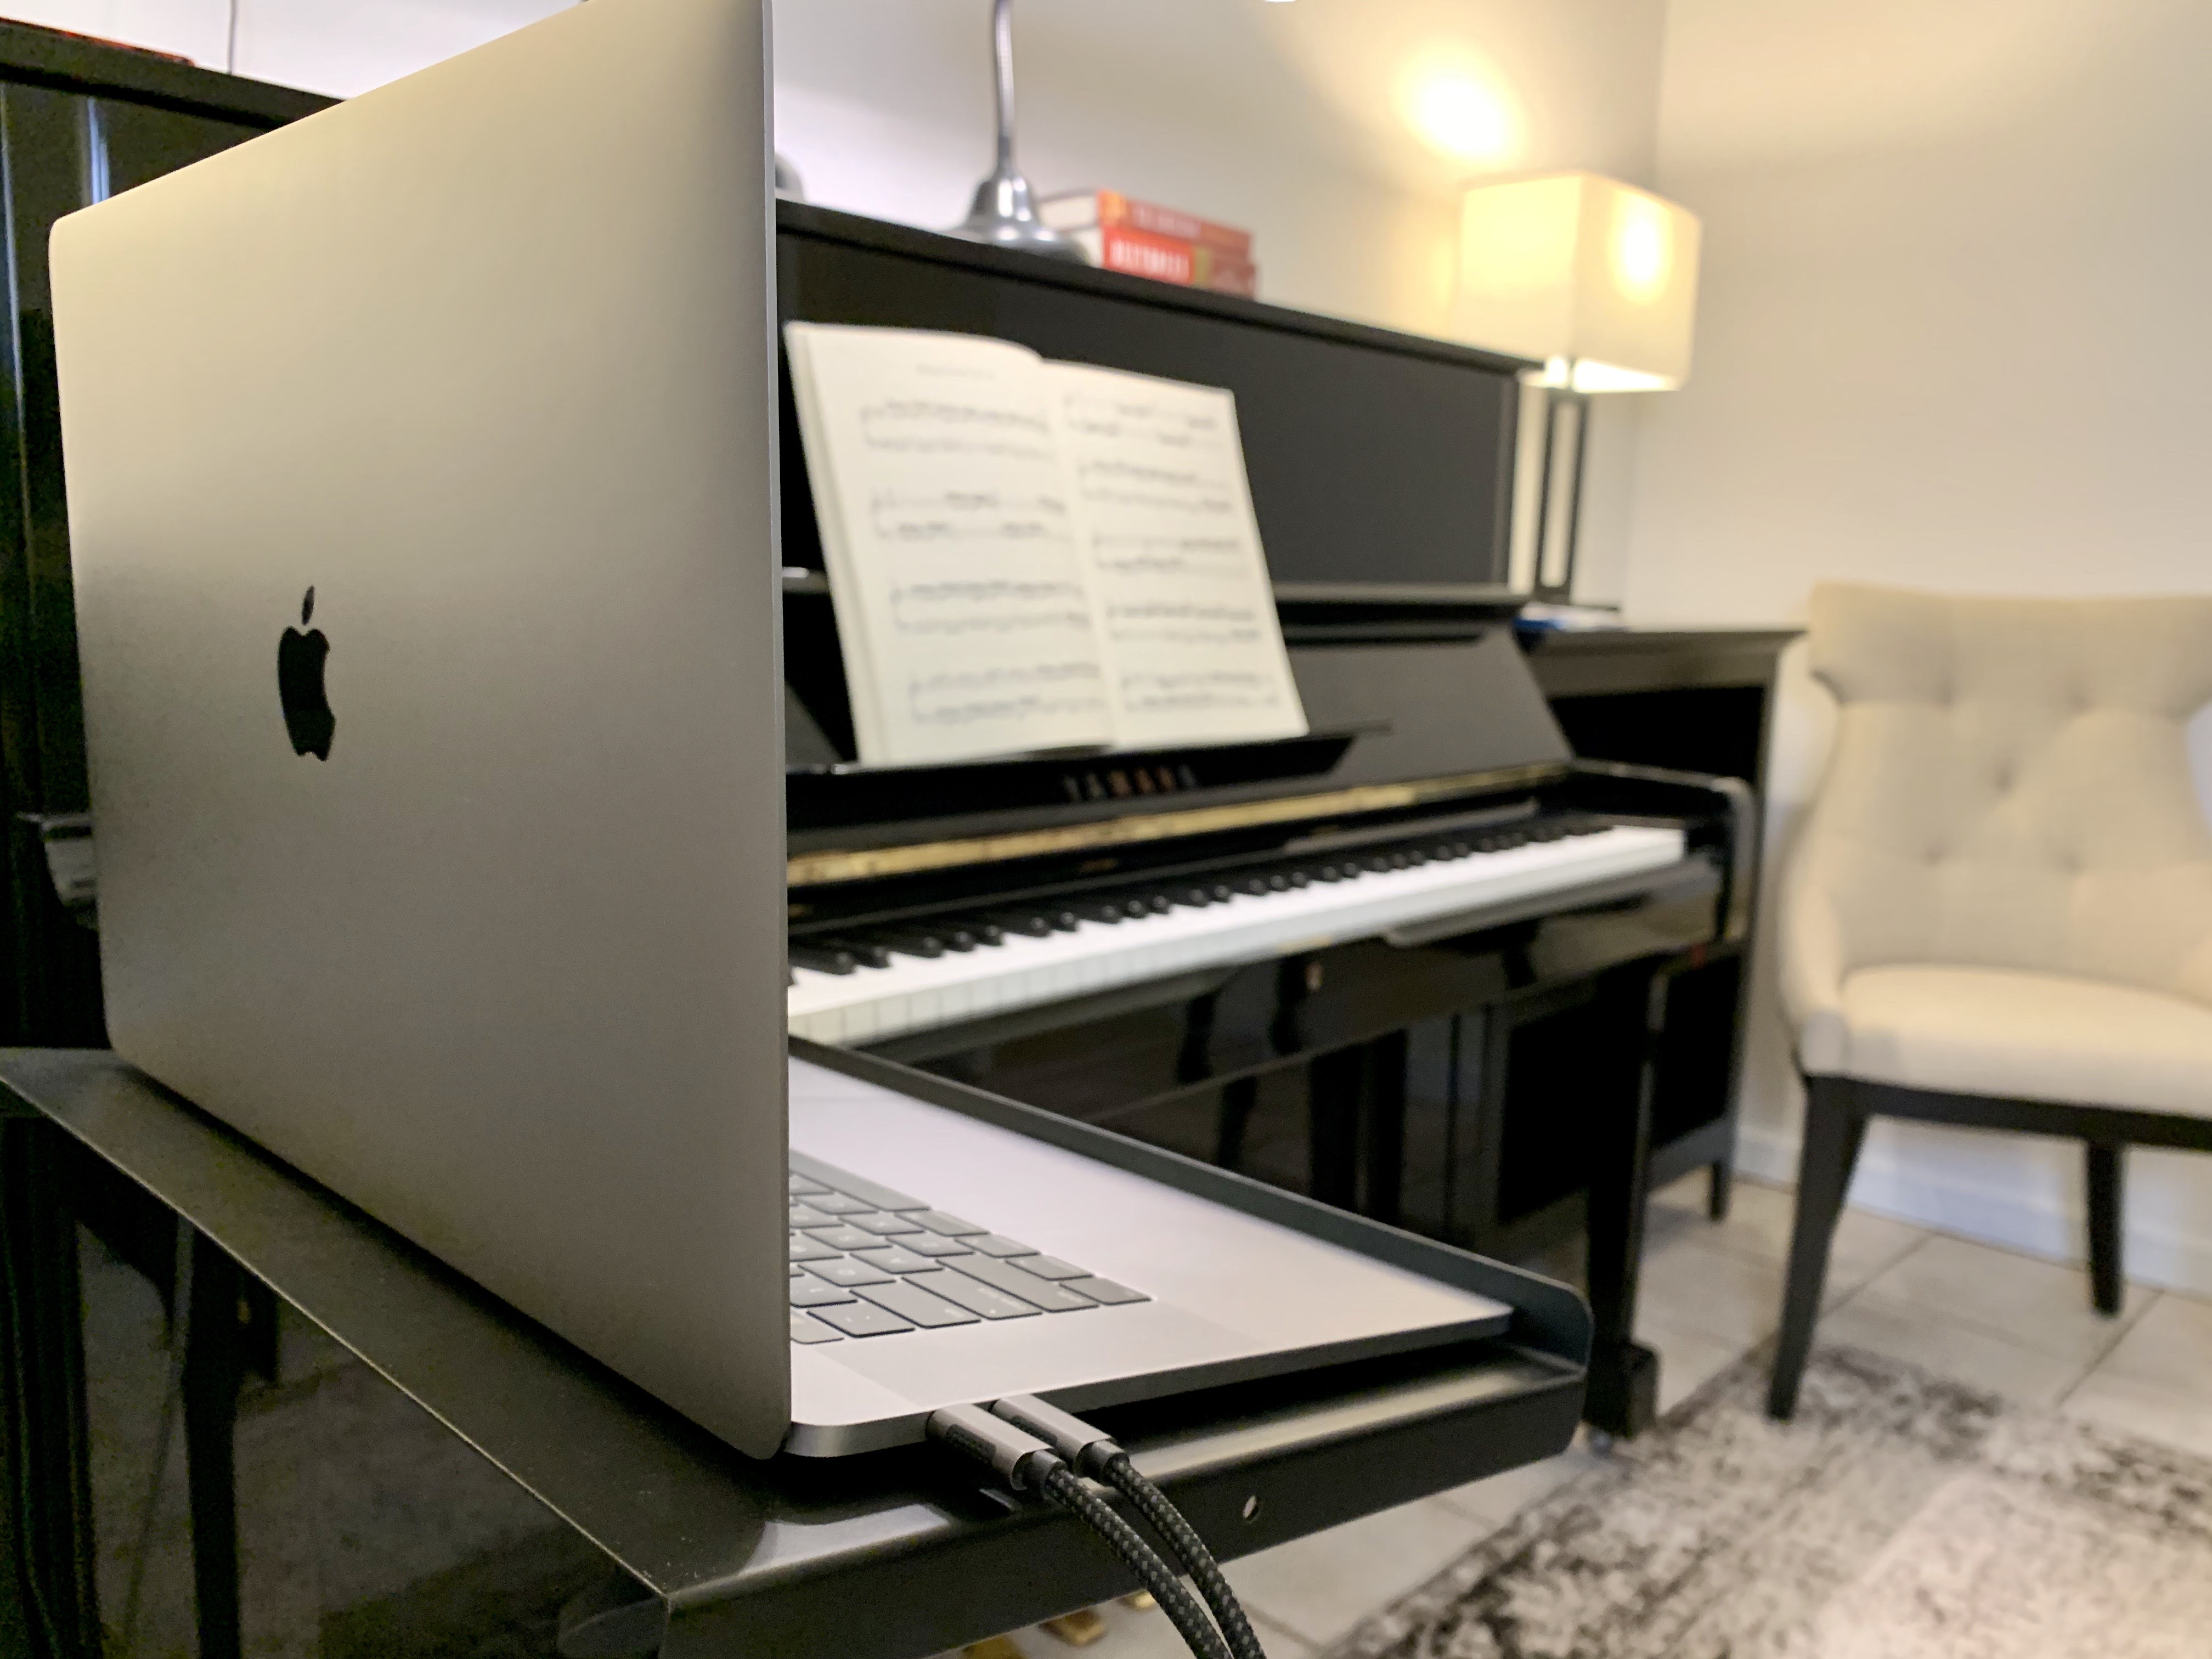
I used this laptop and laptop stand when I first started teaching:
I will go ahead and tell you right now that I recommend laptops and desktops over tablets if you see yourself upgrading the video or audio presentation at all in the future.
Tablets
The easiest and most cost effective way to get started, assuming you have no devices already, is to use something like a recent model iPad. These devices already have good built-in mics and high quality cameras. The only additional item you would need is a floor stand to mount the tablet in the correct orientation.
Tablets such as the iPad are incredibly simple to use, very reliable, and offer the advantage of not needing to close all your apps to get the best performance (unlike desktops and laptops). Tablets are a great way to get started teaching online, especially if you already have one.
The only major downside to using an iPad is that it does not use a full desktop class operating system, which means the upgradability is limited. You will not be able to use many external accessories (such as additional cameras) with an iPad. If you are using a tablet running a full operating system (such as a Microsoft Surface or similar device), you will not have this limitation.
Laptops
The option I recommend for most people is to use a recent model laptop such as a Surface Laptop or a MacBook Pro. Laptops are great to get started with because they offer a full operating system while being self contained with built-in mics and cameras. The hinged screen makes positioning your camera view much simpler compared to a tablet, and having access to a keyboard during the lesson is very beneficial. Since laptops are mobile, you can simply put them on a stand or a barstool and you are good to go.
These devices will have the processing horsepower to run applications in the background as well as the video client, and you can easily upgrade them with external cameras, audio interfaces, mixers, and all sorts of other things down the road. At the time of writing this, I am currently using a MacBook Pro, which powers my entire setup. The newest generation of MacBooks featuring the M1 (or newer) chip are ridiculously fast and make zero fan noise. If you have yet to purchase a computer or need an upgrade, an M1 Mac is the way to go.
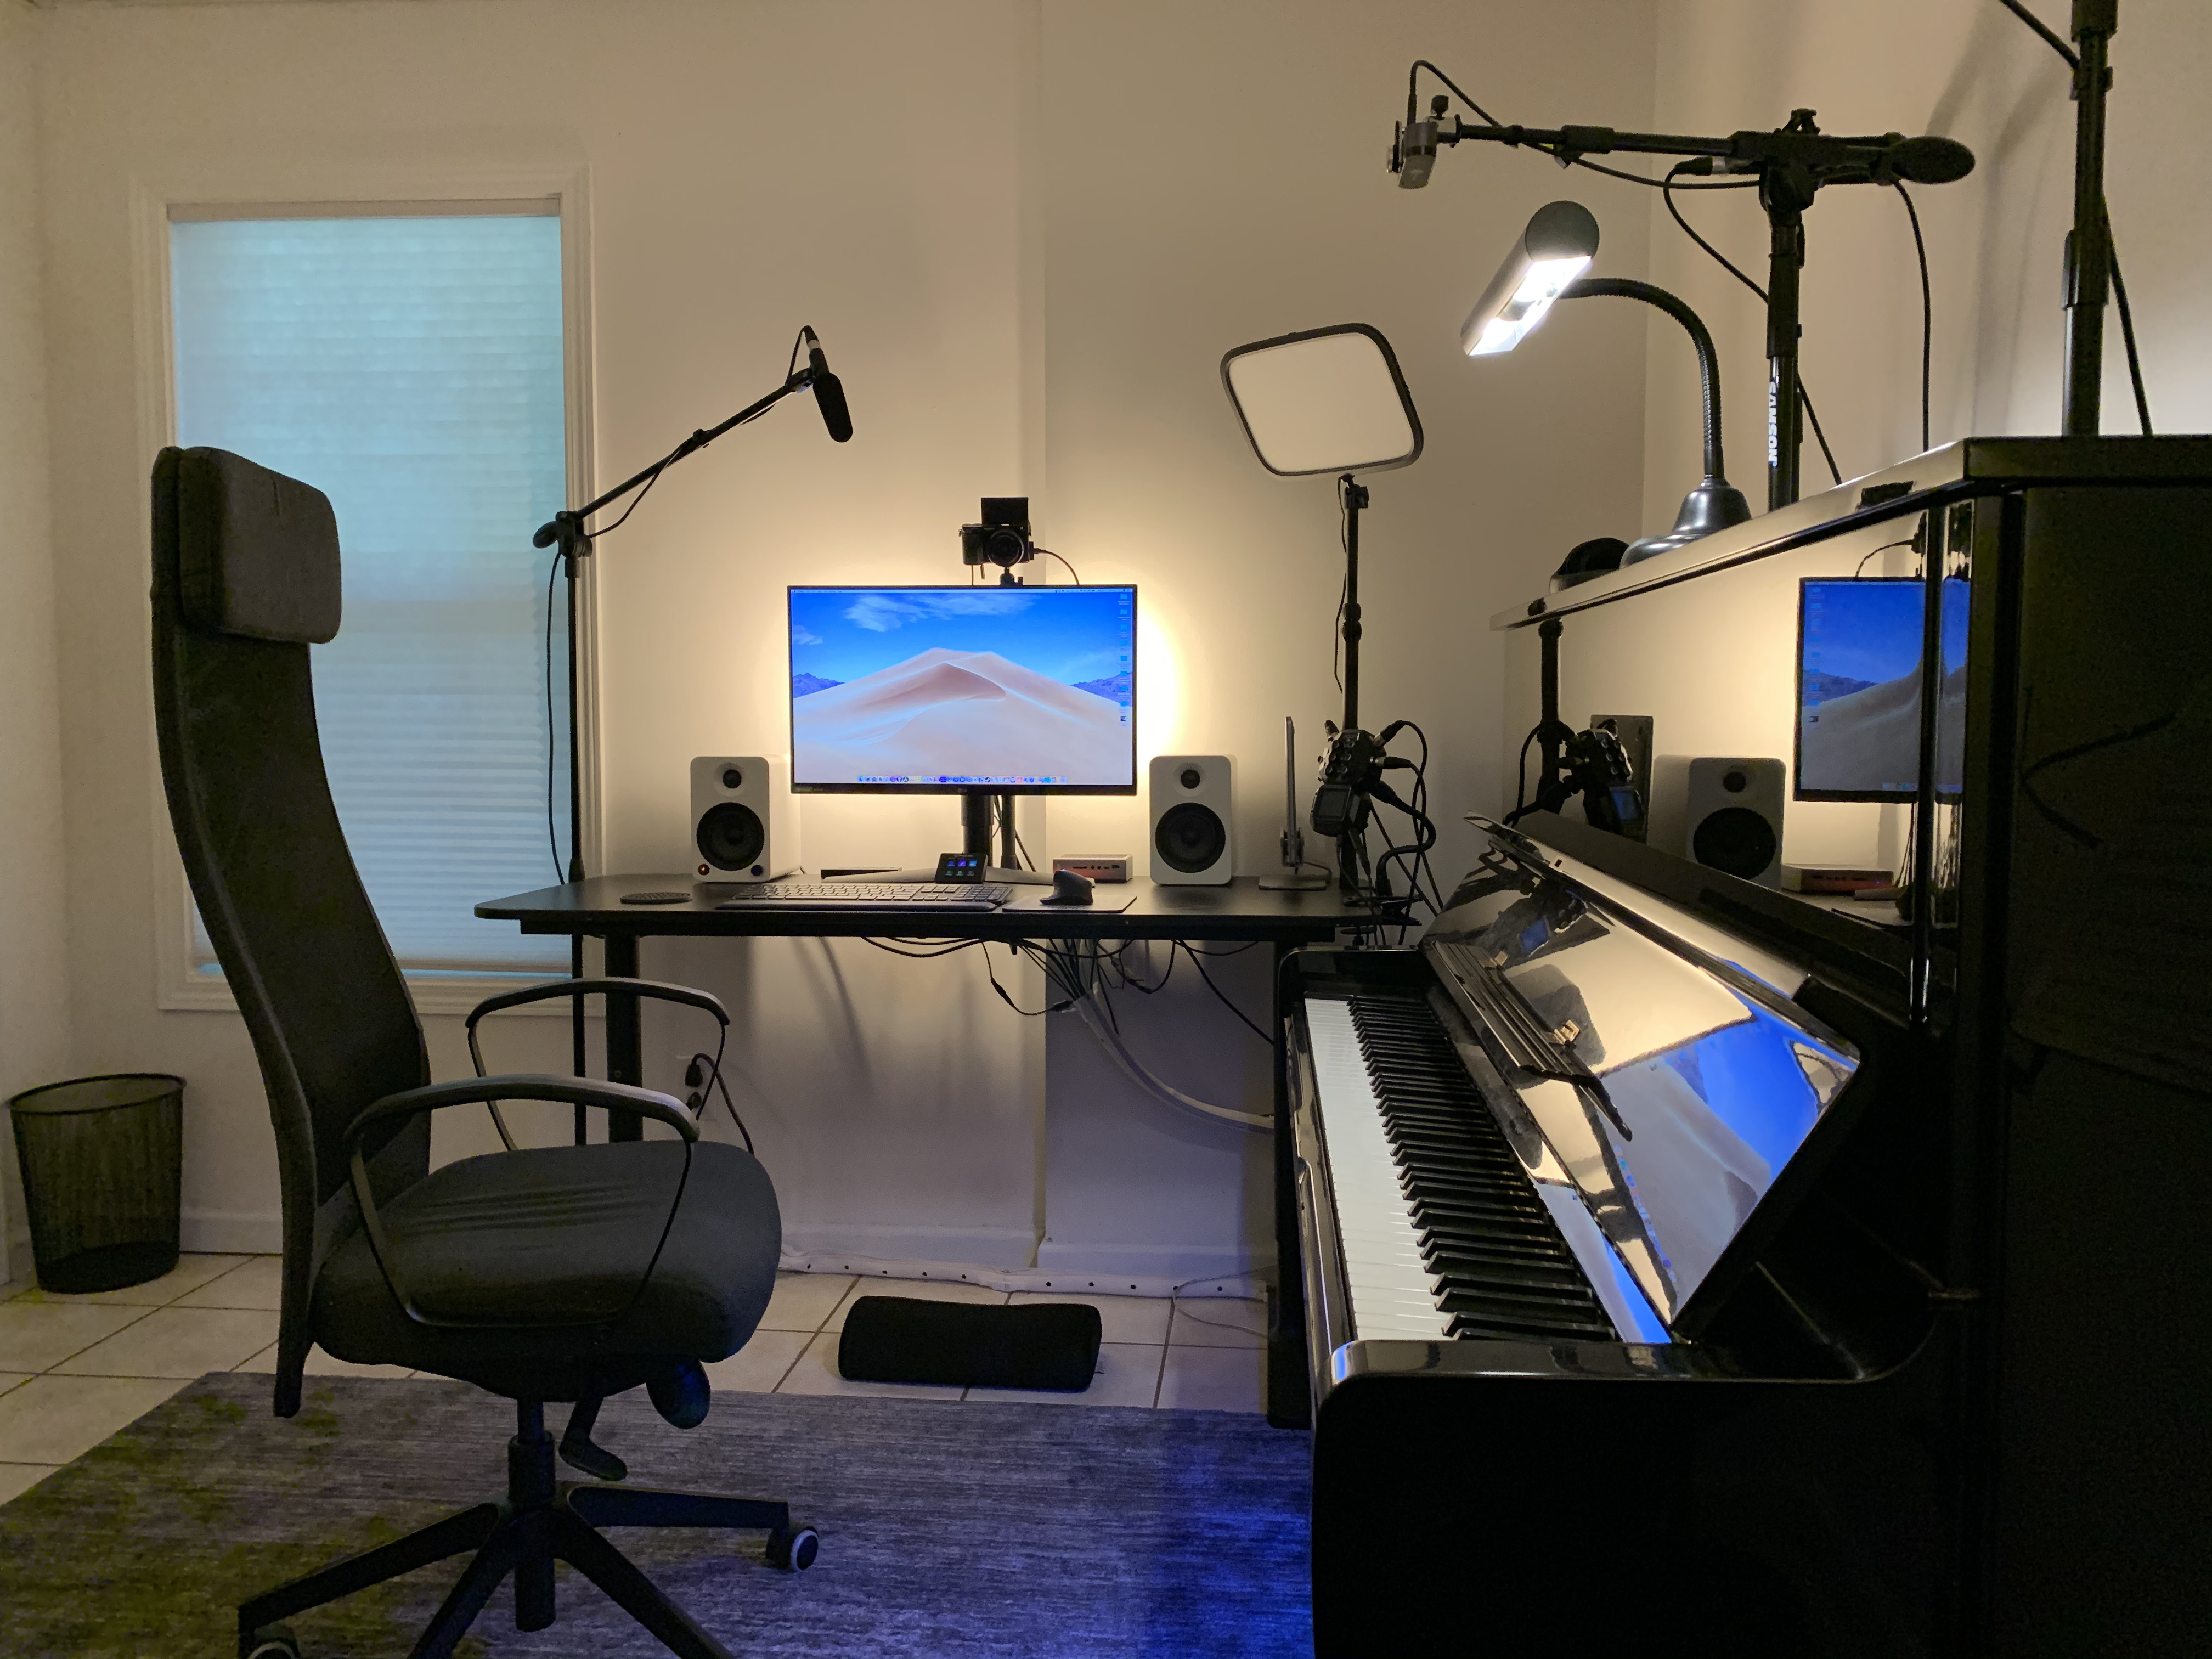
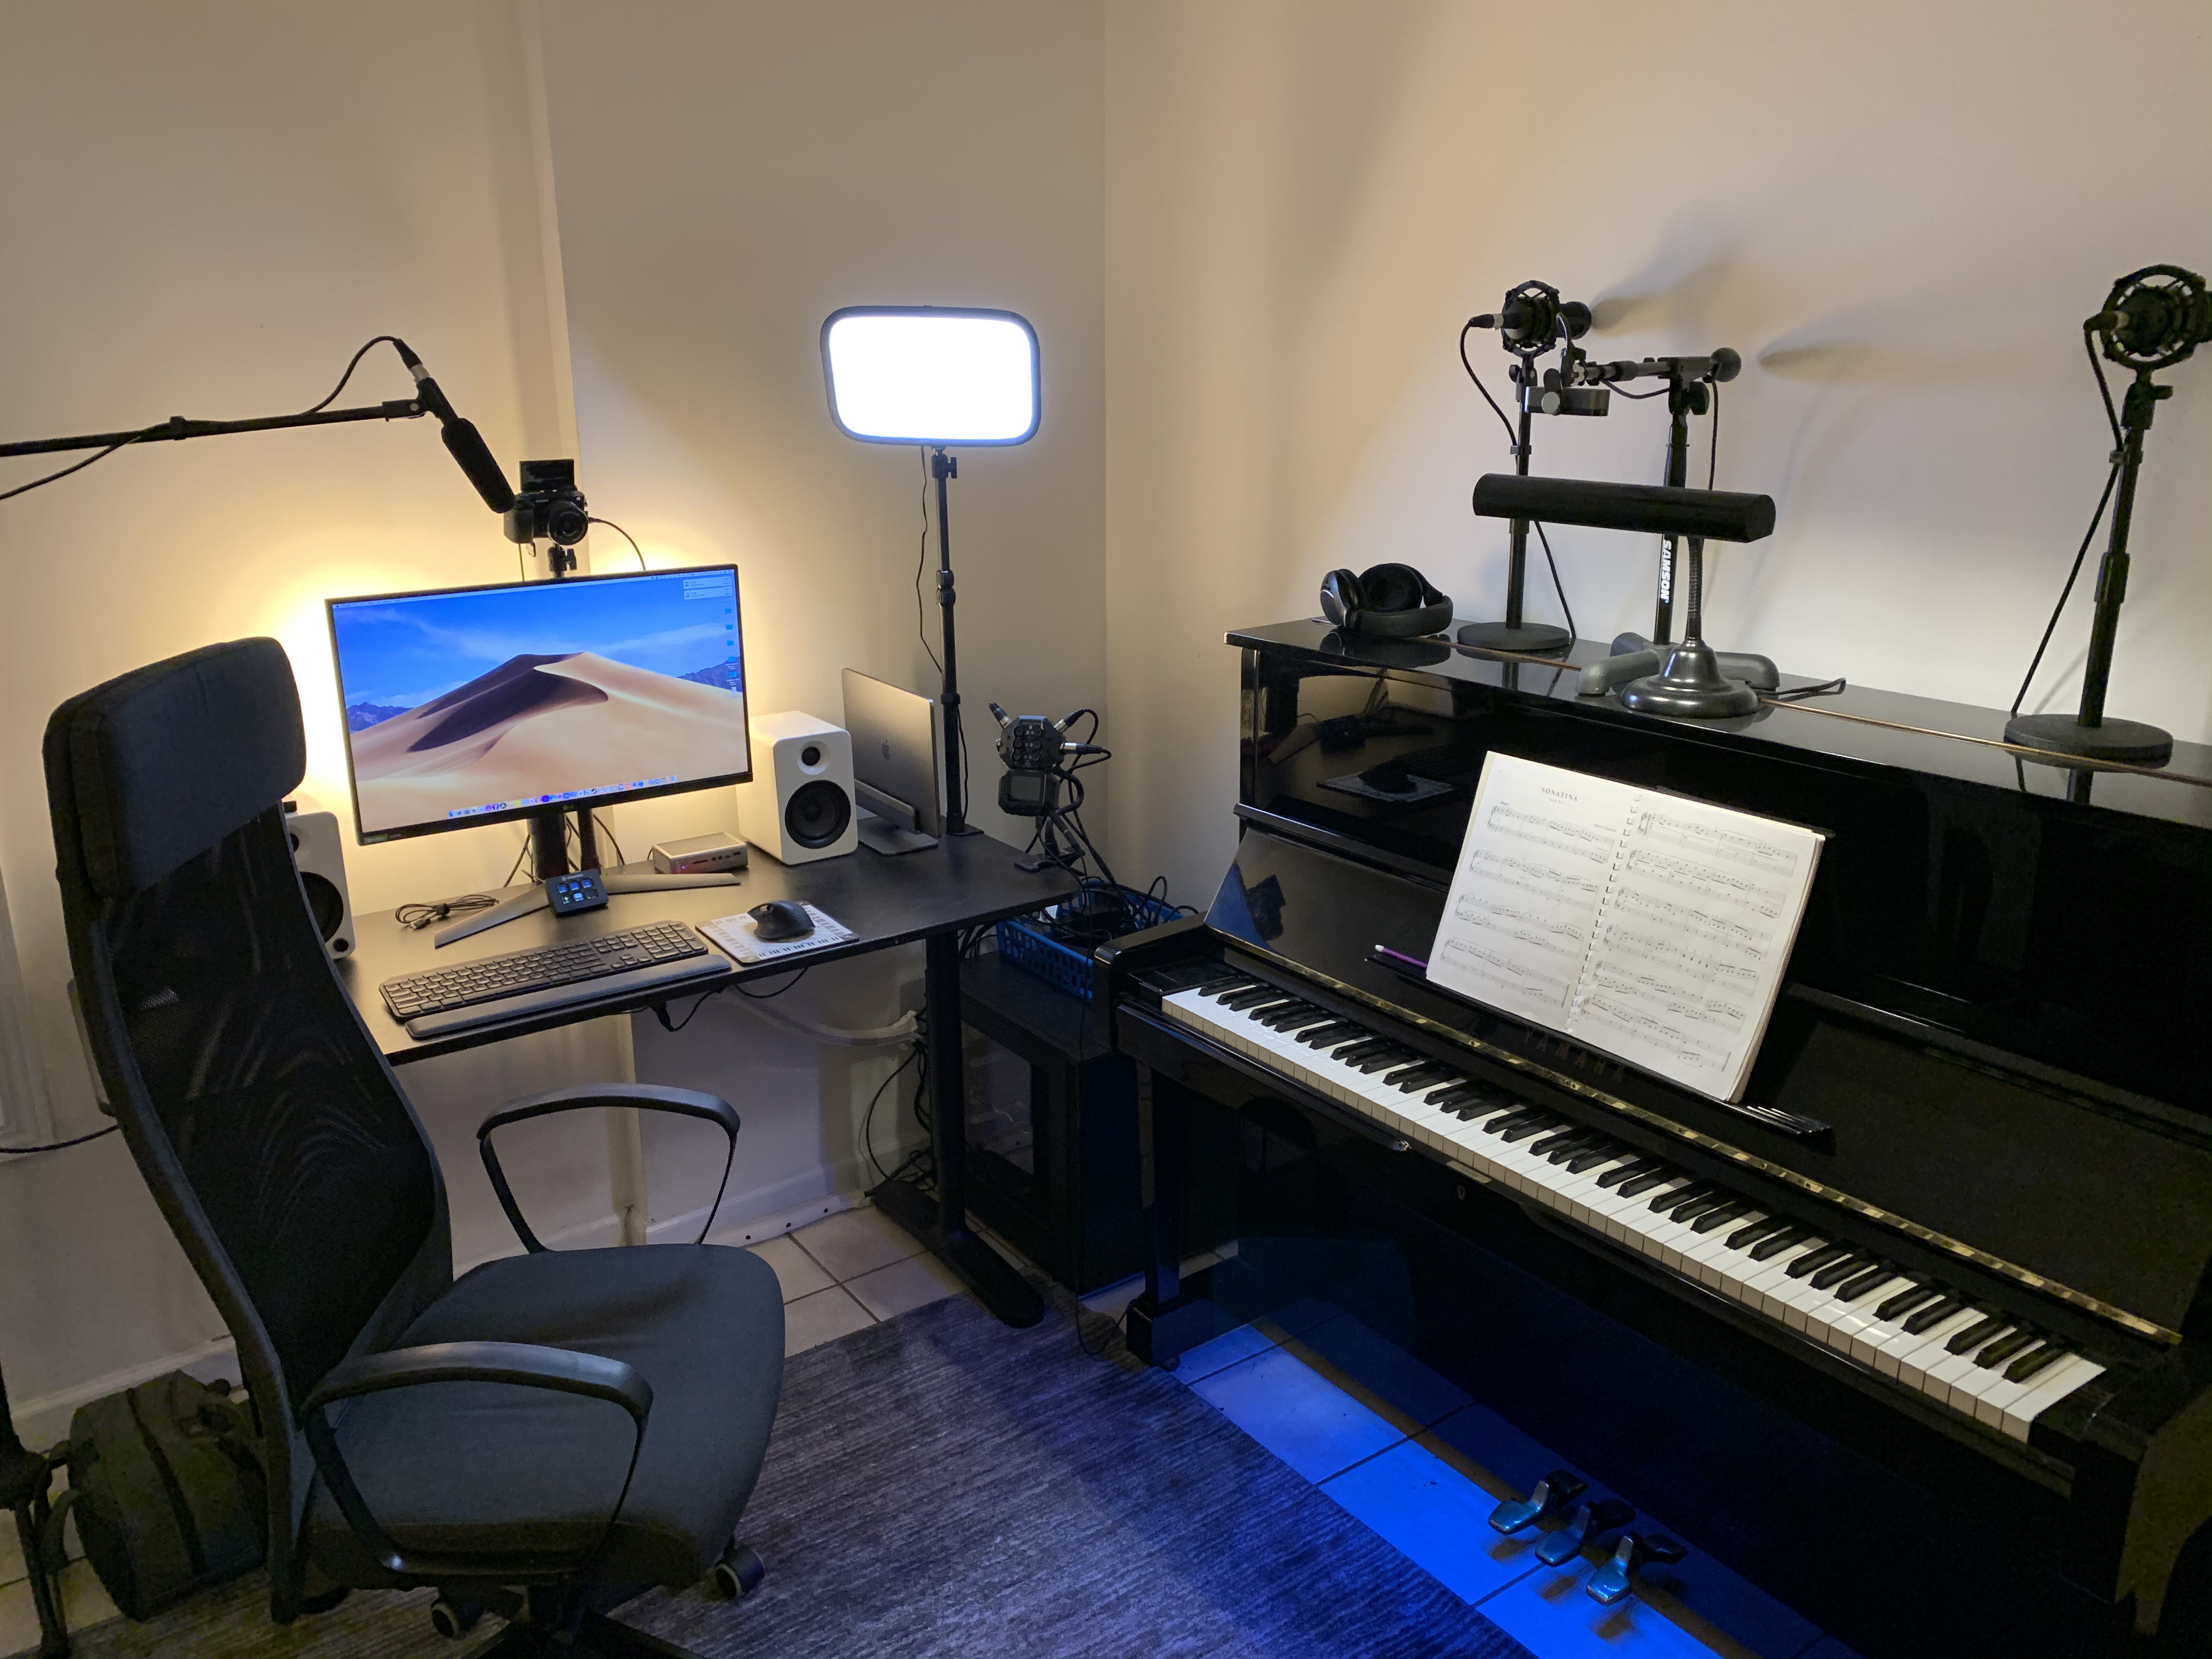
Desktop “Workstations”
My personal teaching setup of choice is to use a desktop based setup (or a desktop workstation powered by a laptop). Desktop setups can be tricky because they are very immobile. Since desktops are usually part of a workstation at a desk with a monitor and keyboard/mouse, you will need to situate your instrument and musical setup around your desktop, in contrast to the above setups.
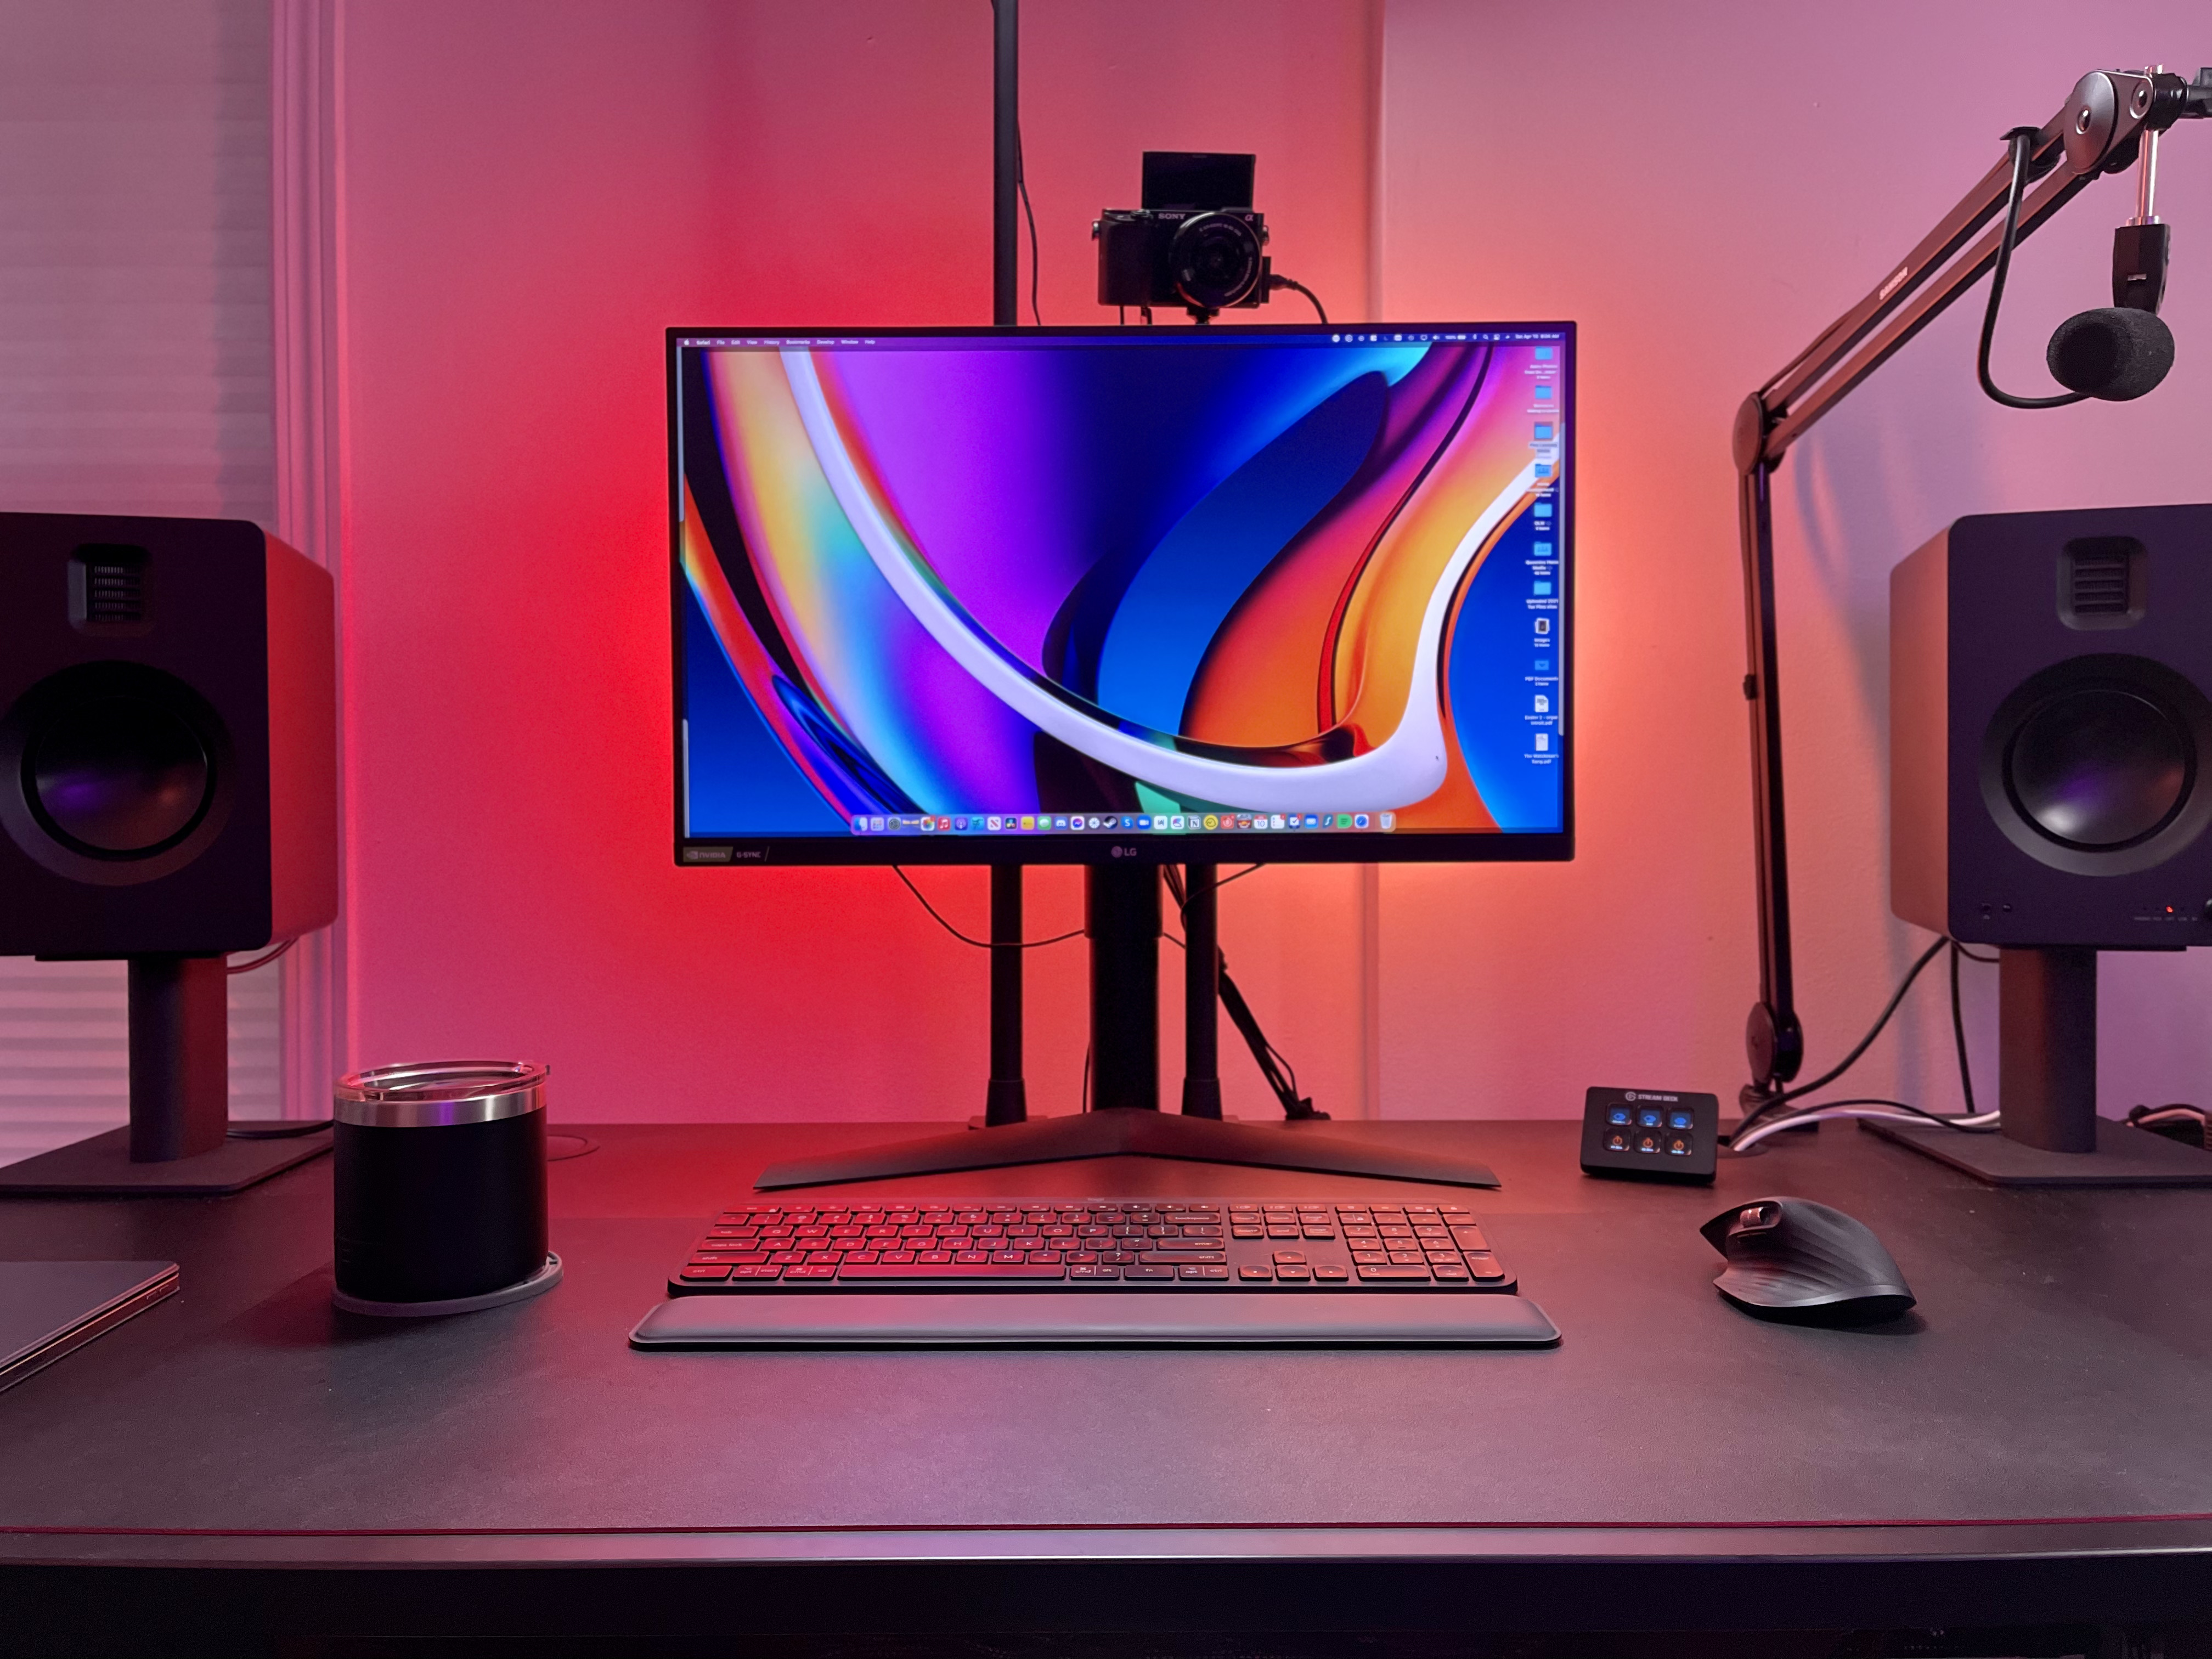
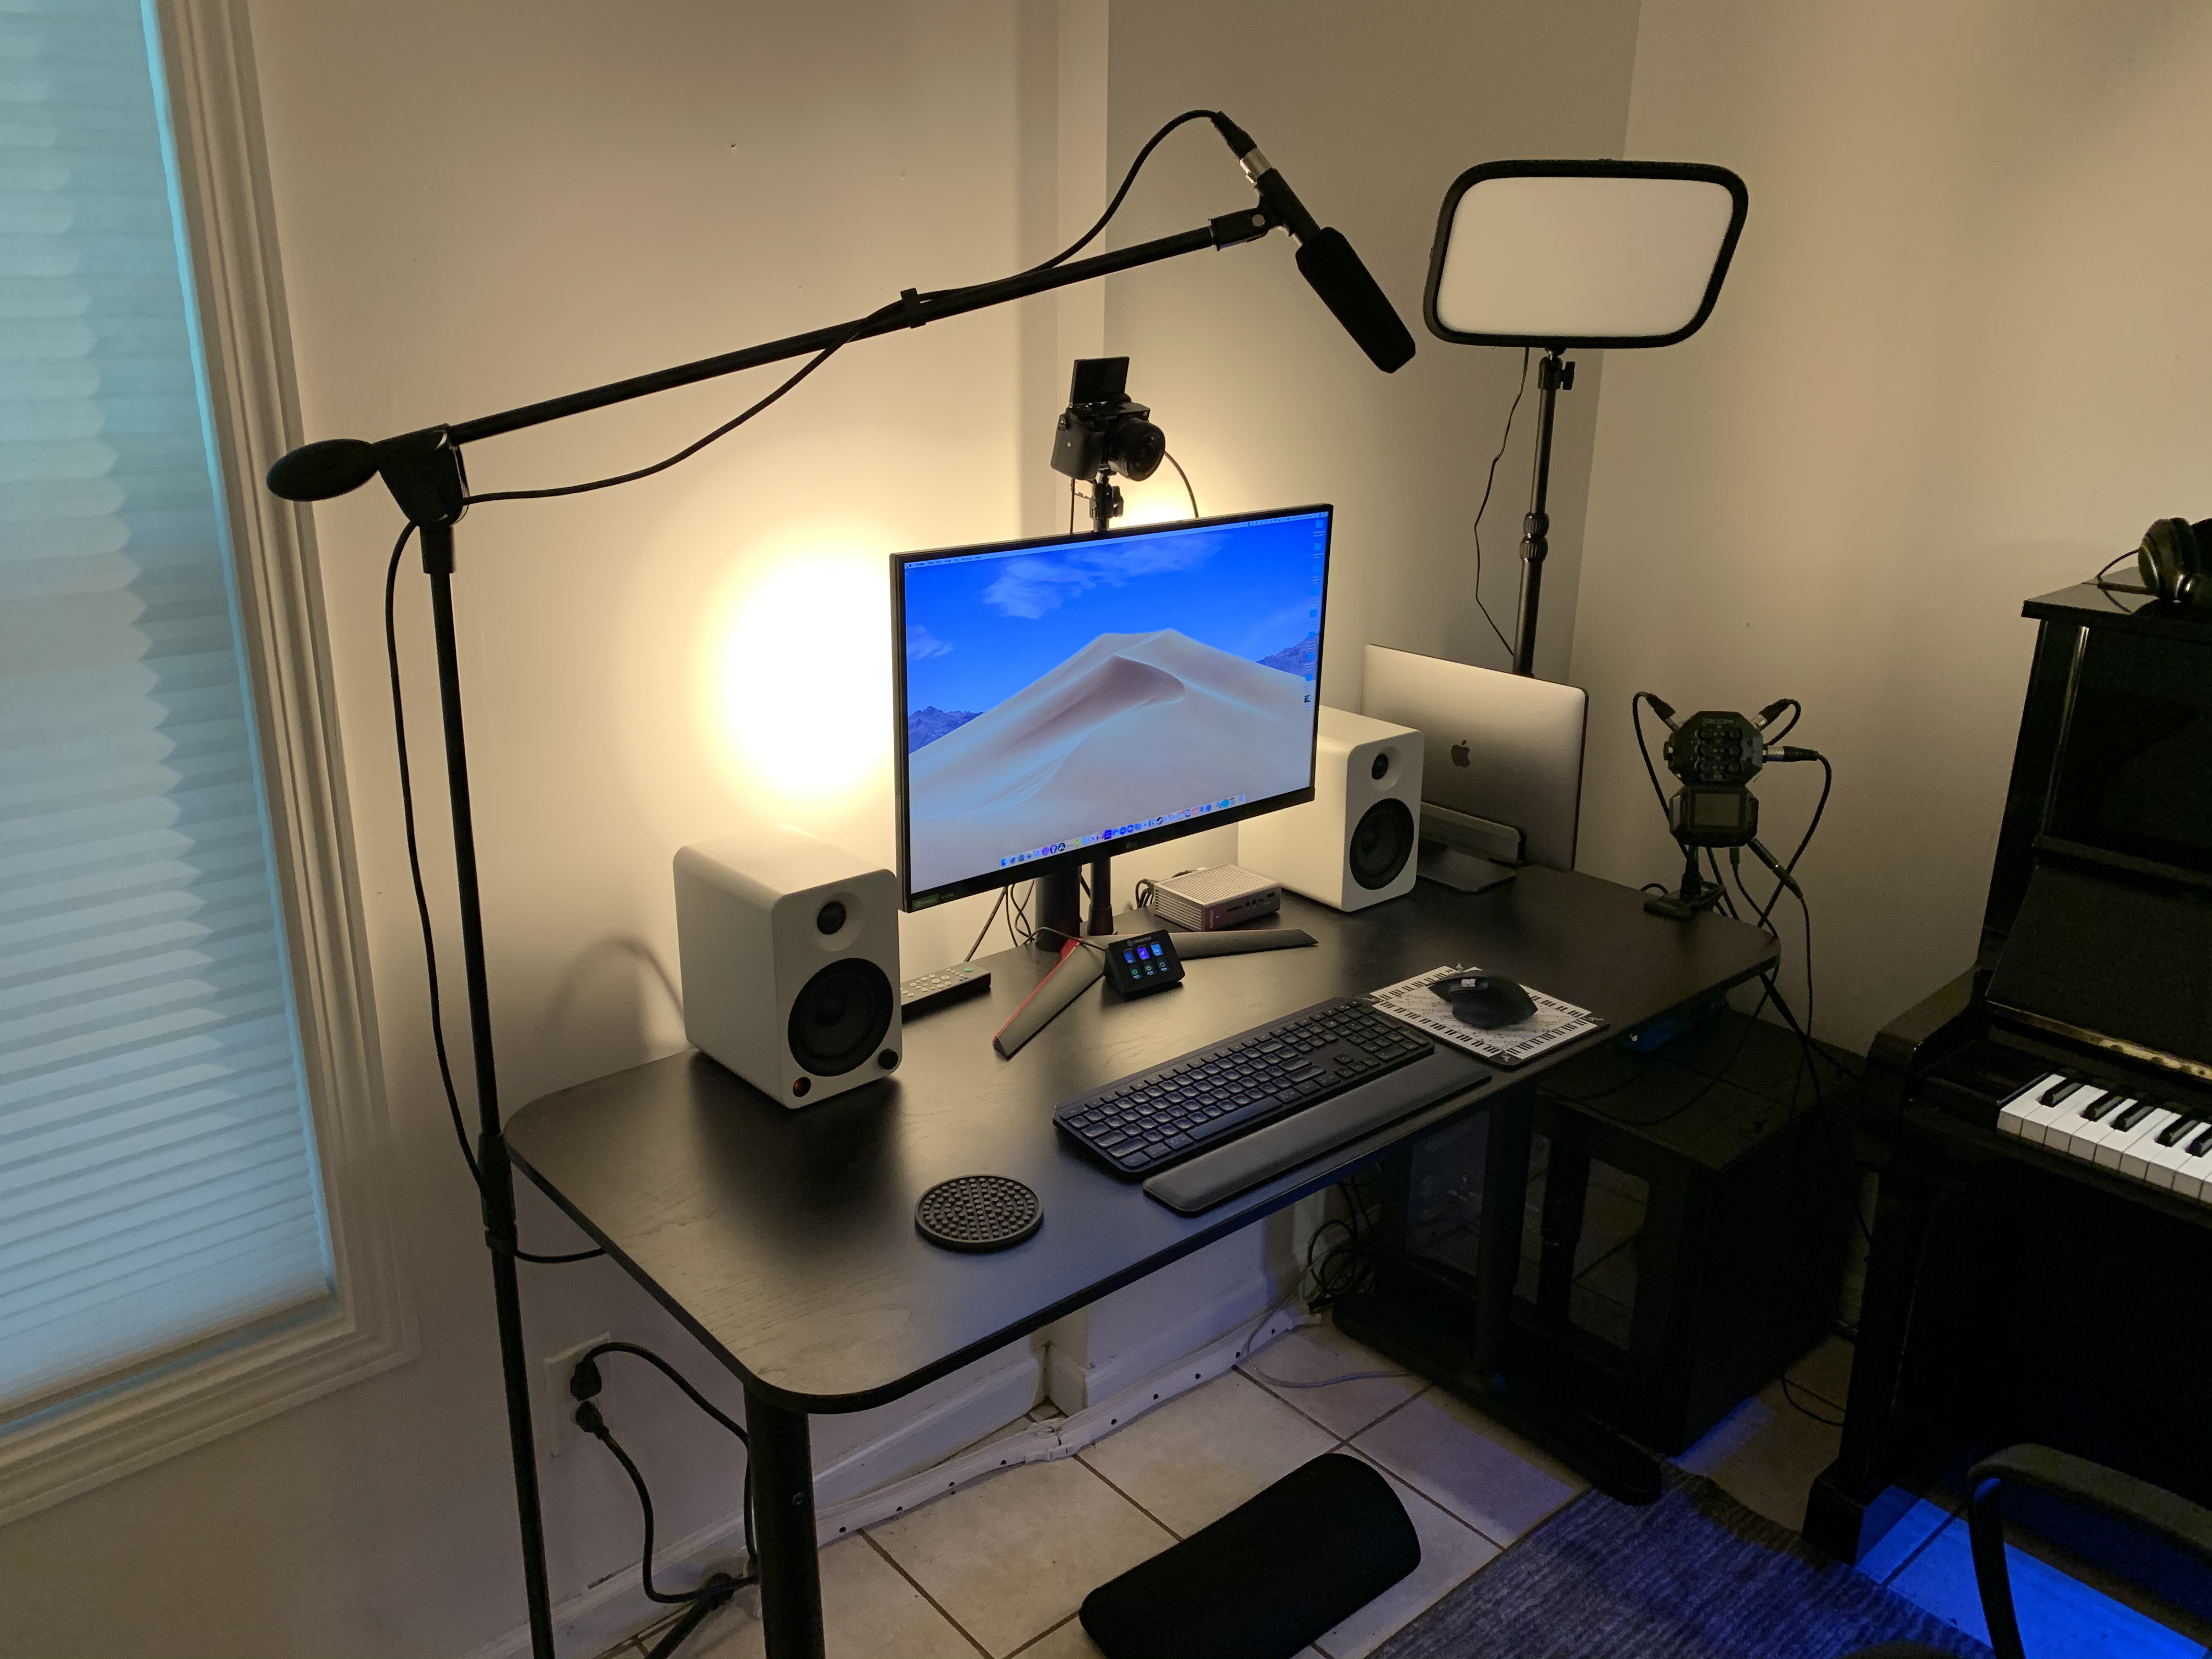
This is a more recent teaching setup, based around the idea of a "work station." After many years, I have upgraded to something that looks great and is very comfortable to teach with.
Desktops require external cameras and microphones to work. When using a desktop for teaching, you will need to purchase some type of USB webcam, preferably with a 1/4” or 20mm mounting thread, and a lightweight tripod or monitor clamp. The webcam usually has mics on it, which is fine to get started, but your next upgrade will need to be an external microphone. You will also require an ethernet connection or a wifi adapter of some kind (USB or PCI).
Desktop based setups do offer some advantages in that they are very expandable and they offer the most flexibility when placing cameras and microphones (since they are external). They are also very comfortable to teach in for long hours and can easily do double cuts as content creation workstations. This is why I ended up upgrading to a desktop-type solution.
That being said, optimizing this option for comfort and functionality can make this the most expensive option very quickly.
What Are Your Plans for Teaching Online?
How much do you want to invest in teaching online? Are your plans to teach online temporary or permanent? The answers to these questions will help you figure out what type of setup to invest in. Each type of setup has a different technological and financial barrier to entry.
Choose a setup based on what you already have and consider your upgrades down the road. If you are planning on returning to in-person lessons as soon as possible, you may not want to spend more time or money than necessary with your setup. In this case, go with a tablet or inexpensive laptop and be done with it.
However, if you want to always offer an online option, plan to create some online content, or wish to make your studio exclusively online (as I have done), a reliable and enjoyable setup will prove helpful and likely will make you more money in the end. In this case, go with a higher end laptop or desktop and relevant accessories.
Arranging Your Studio
Arranging and positioning your equipment can be a largely subjective issue. However, I wanted to offer you some insights based on my experience to get you started.
Questions to Consider:
What do your students really need to see for lessons to be effective?
Do you have access to a stand, mount, or nearby table for any of your equipment?
Will you be using an external microphone?
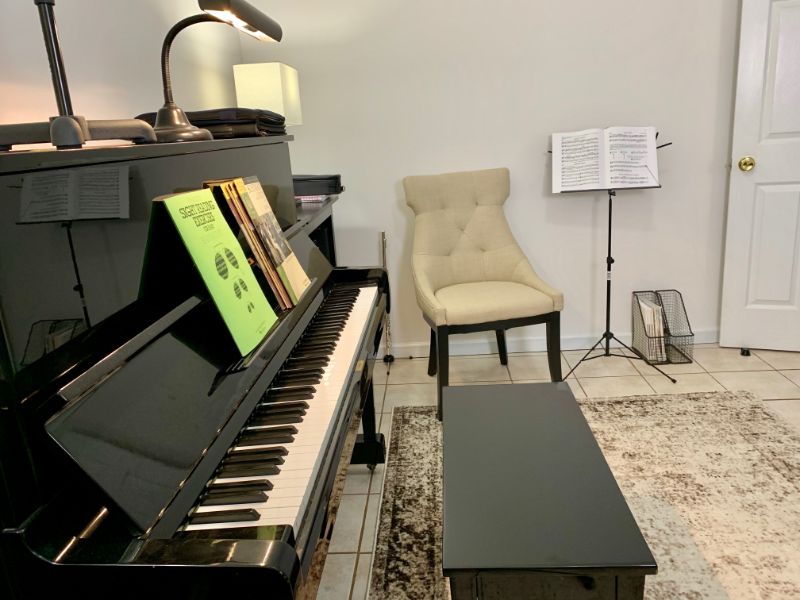
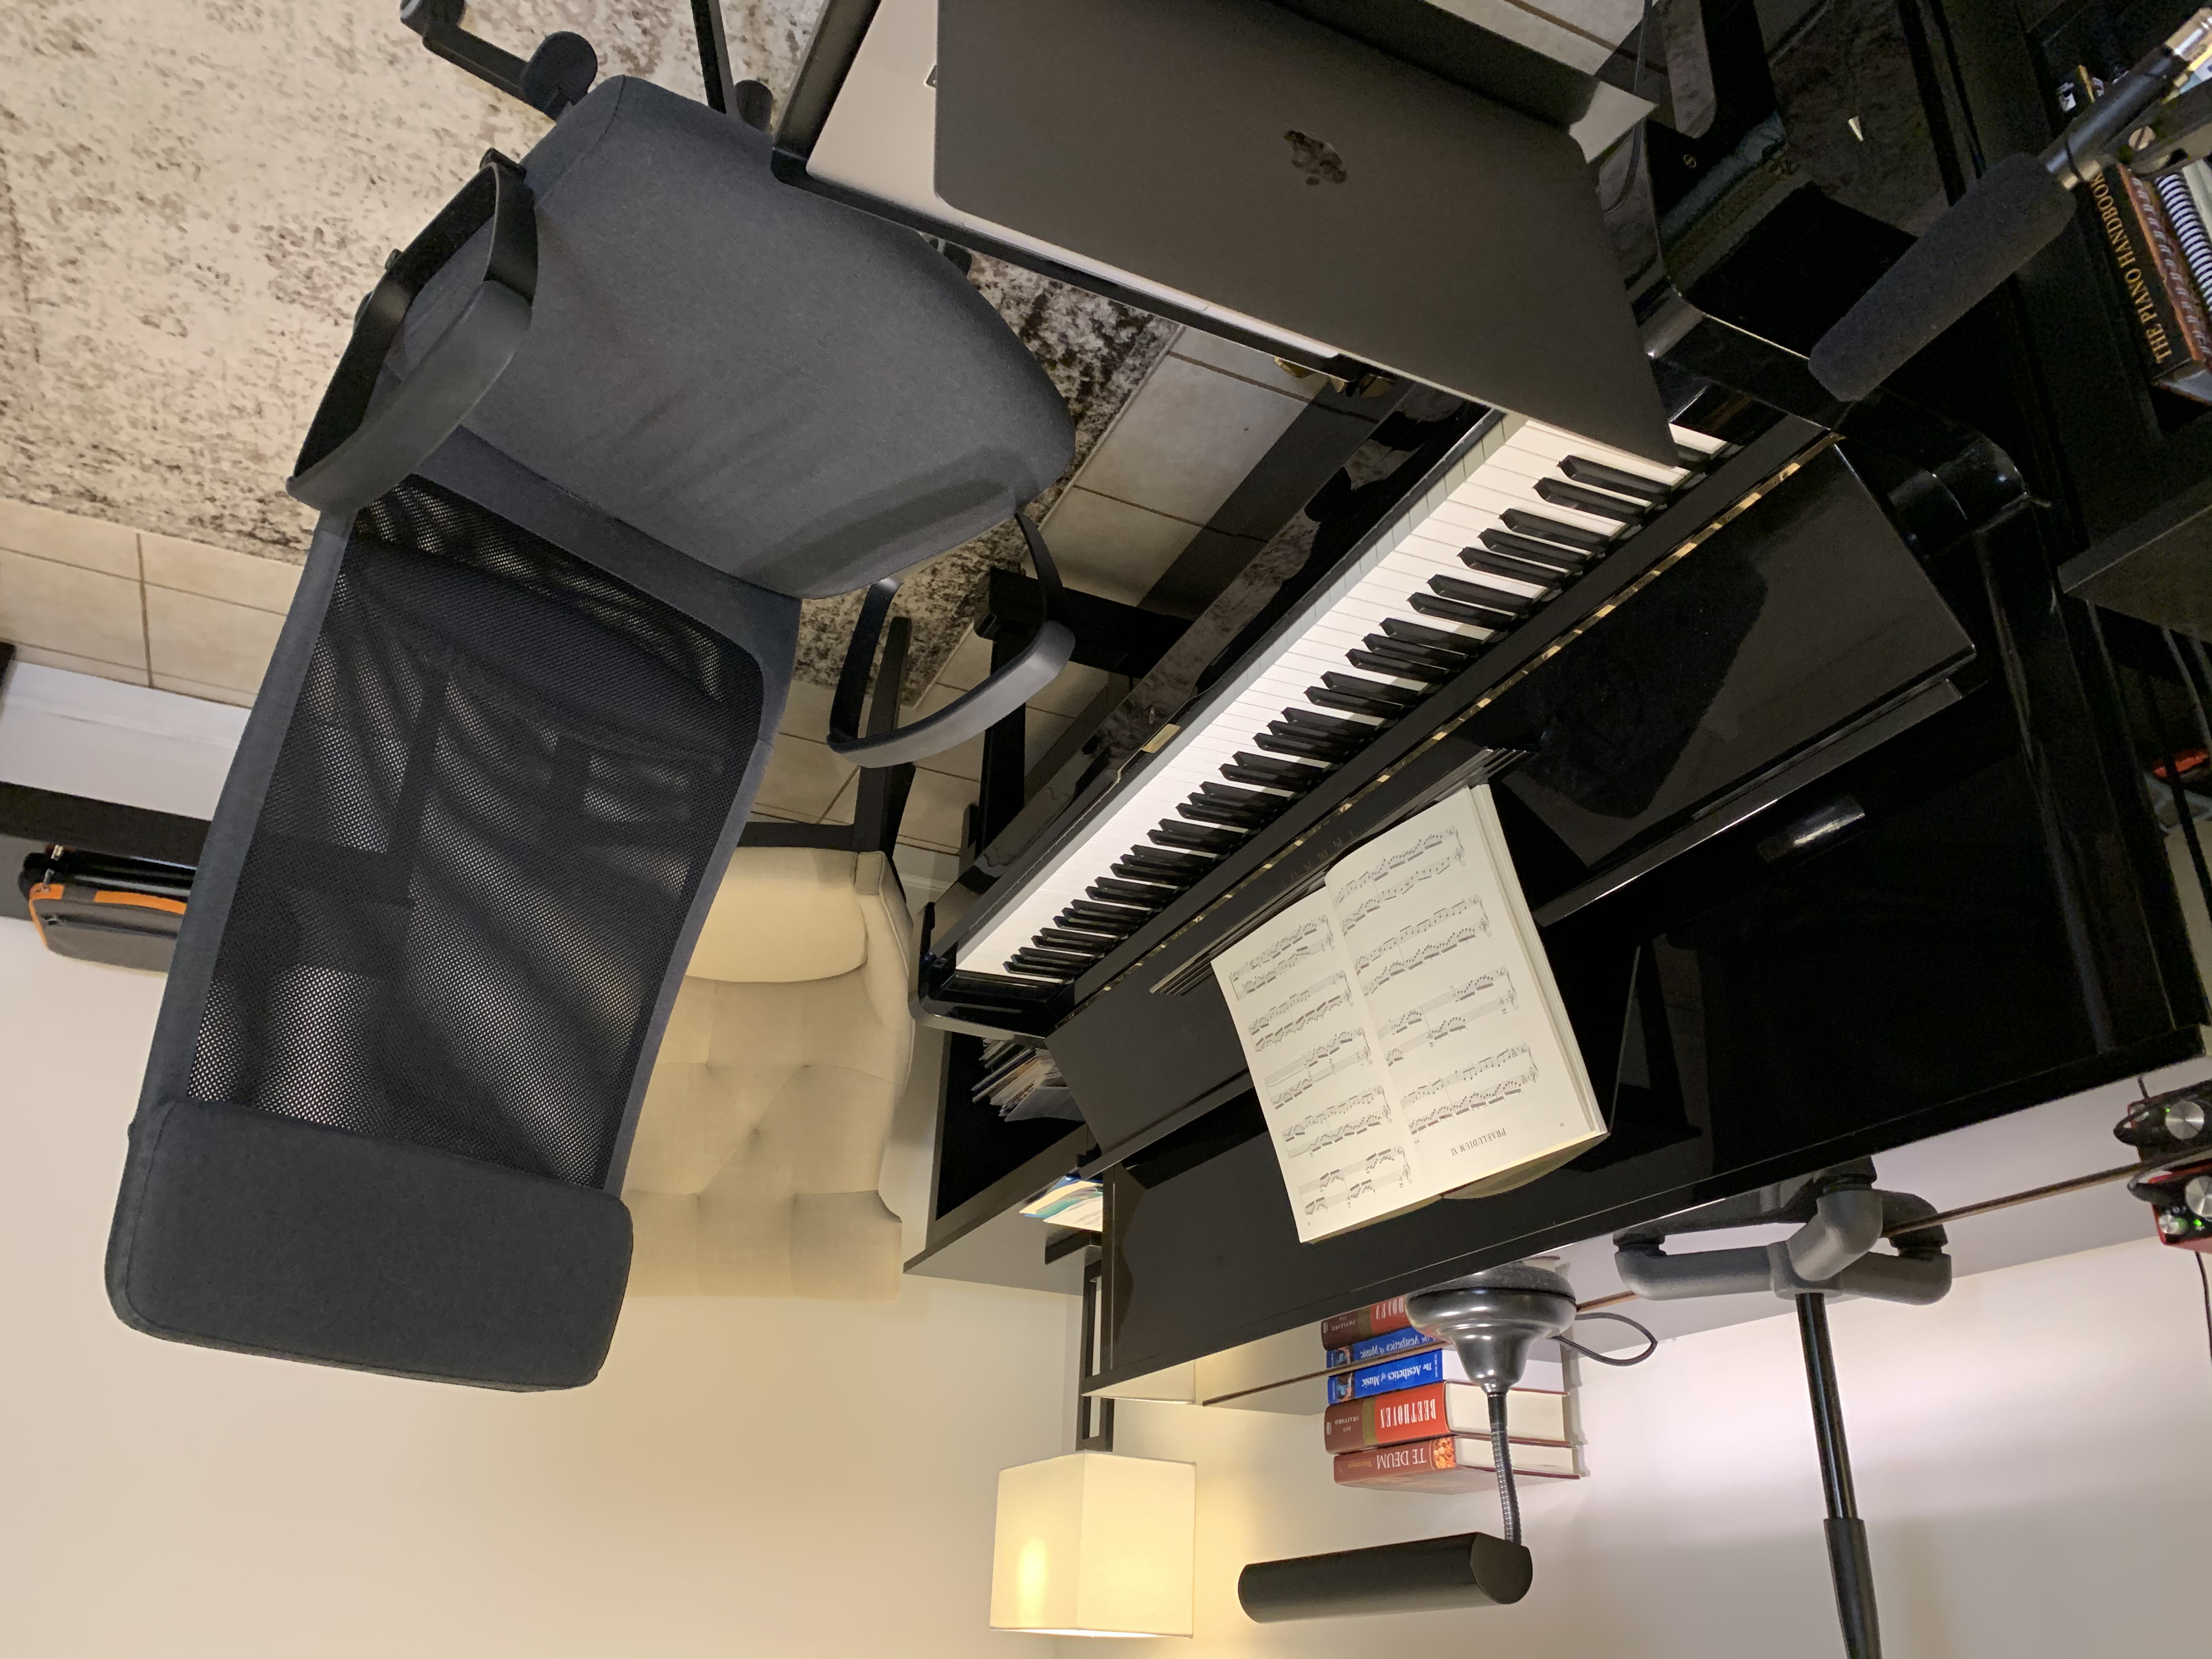
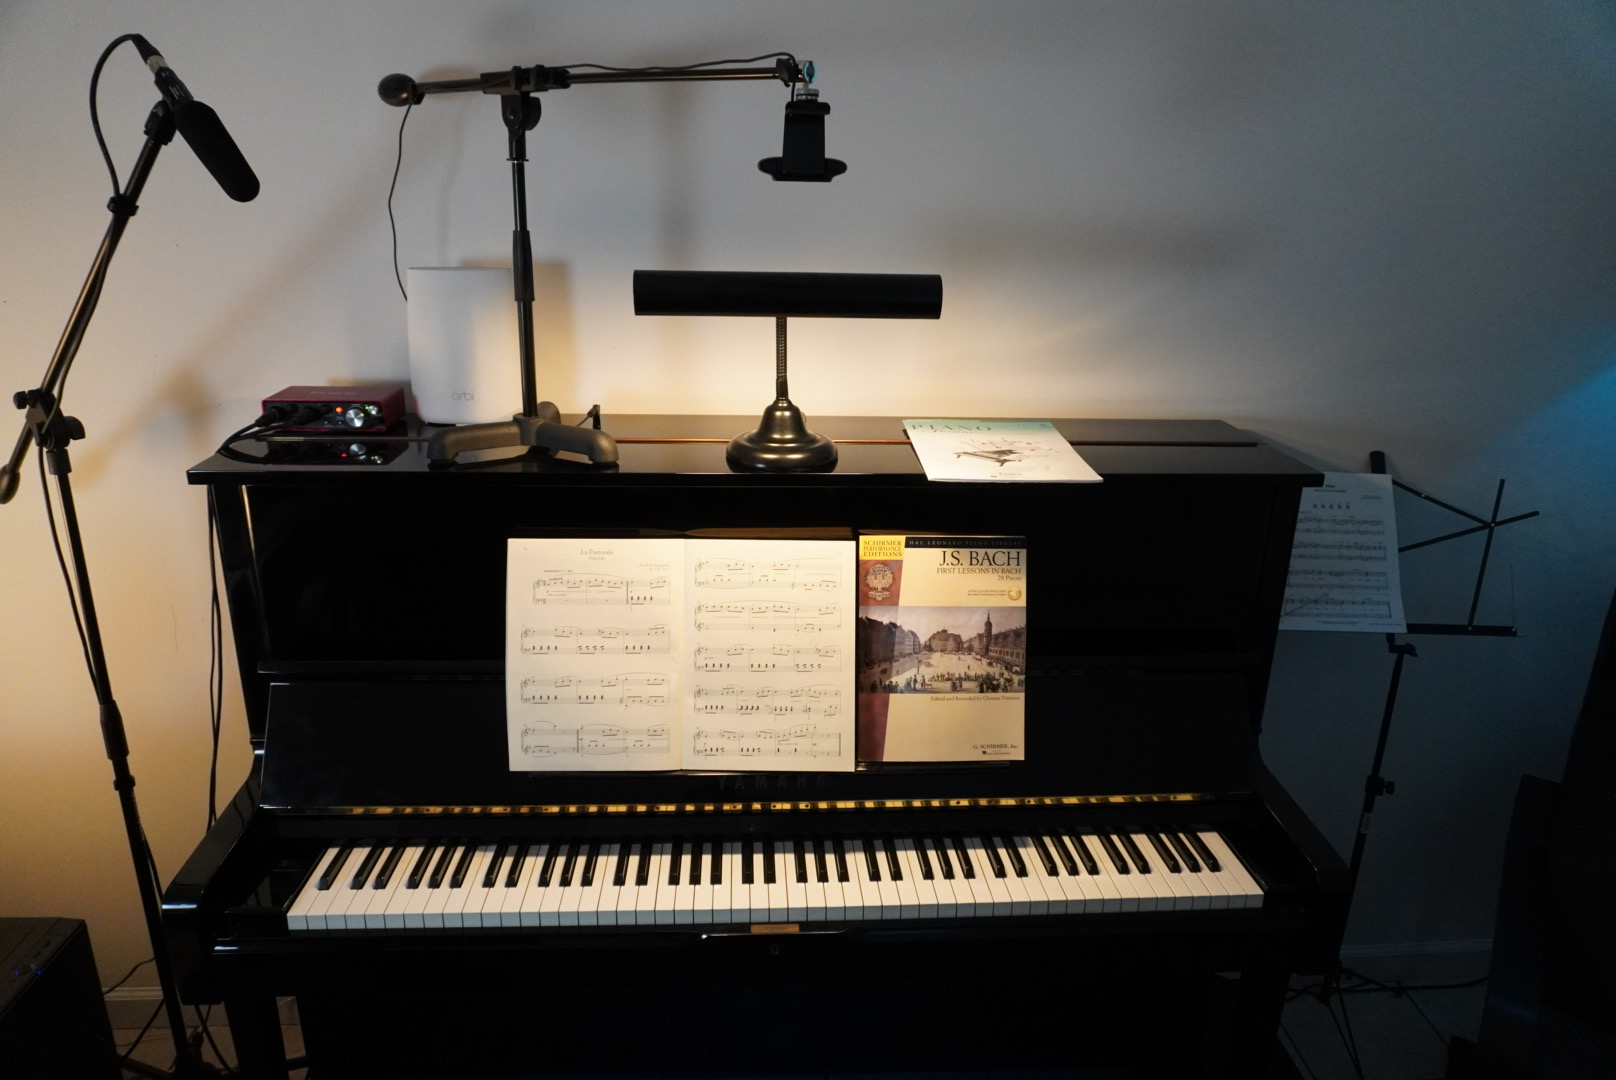
In this image, the camera is roughly in line with the keyboard and the bench. A student would see the entire keyboard as well as the teacher during lessons.
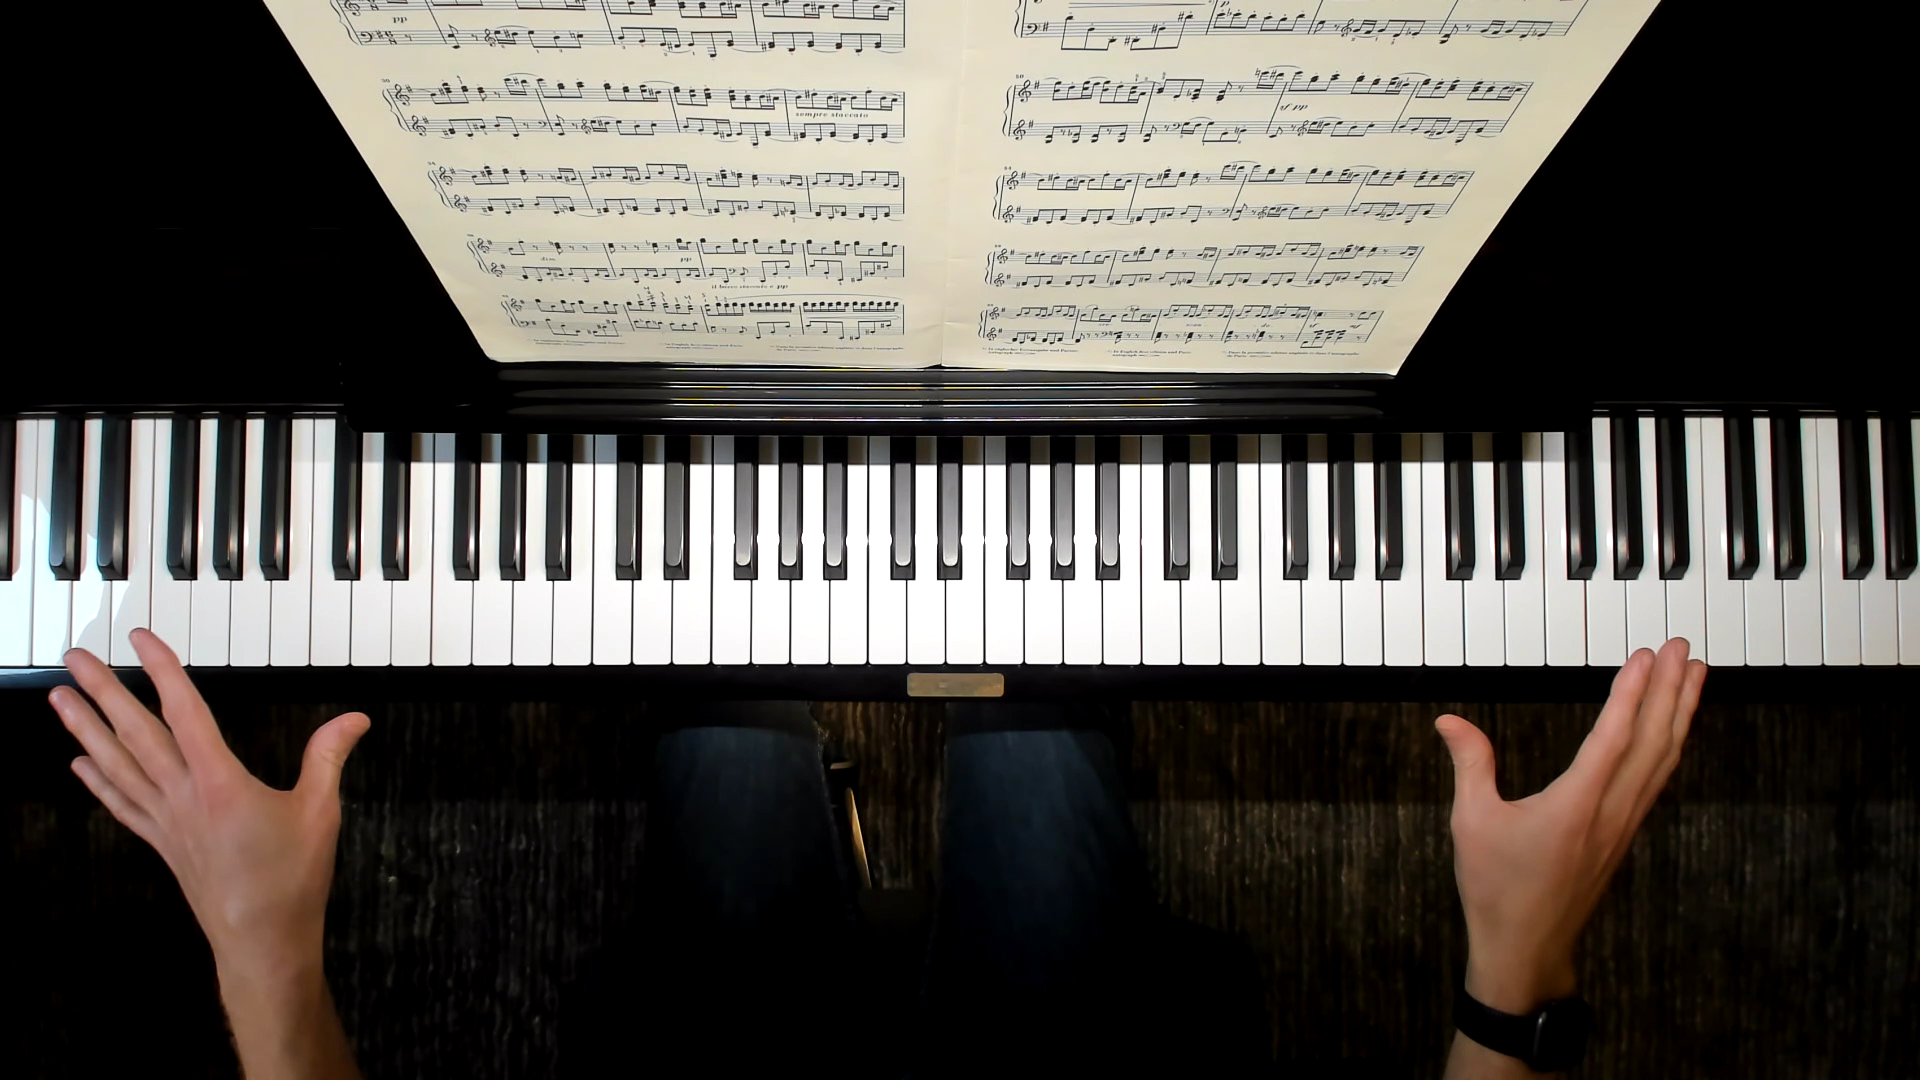
Positioning Your Camera
Since I teach piano, I will use the piano as my example when making recommendations. I prefer to position my camera somewhere between being inline with the bench and inline with the keyboard. When I was using a laptop, I positioned the laptop webcam using the same parameters. Also worth mentioning is the fact that all of my accessories and power was only accessible on the left side of the keyboard, which determined how my setup was laid out.
This camera position allows me to fit the entire keyboard into the frame as well as my face, so that lessons can feel more personal. Depending on your camera, you may even be able to fit the pedals into the frame. If the above image represented your studio, you may wish to move the camera to be exactly in line with the bench for a more angled view.
Here is another example of ideal placement.
With regards to camera height, I recommend something close to eye level of the person who is sitting. If the camera is too high, you won't be able to show your face. If the camera is too low, your student may not be able to clearly see all your keyboard interaction. Considering this, I recommend purchasing a tablet floor stand, laptop mount, or webcam tripod, depending on your situation, in order to reach a suitable camera height.
For other instruments, you will need to be the judge. We should ideally be able to see all of the operating portion of an instrument, along with the teacher's face and preferably, their posture.
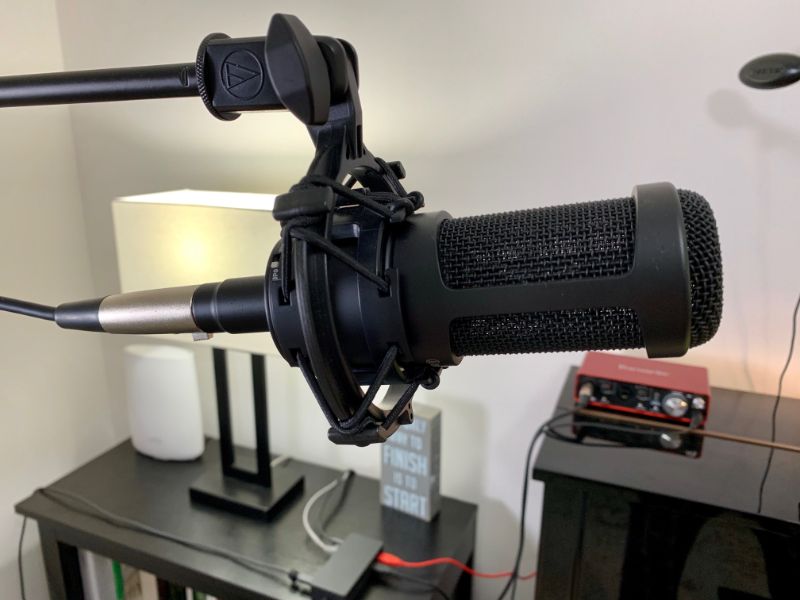
Positioning Your Microphone
The most important benefit of an external microphone isn't always improved sound quality. Usually, it is the freedom to position the mic as you see fit.
In most cases, you will want to position the microphone close to where you will be sitting to best capture your voice. This is because the instrument will likely be prominent throughout your teaching area, but your voice will be very directional.
In this image, you can see an example of a mic situated to prioritize the voice over the instrument.
Many students will be using tablets or laptops with small speakers, and they won't always have access to headphones. If you aren't close enough to the mic, you may have some difficulty engaging your student, especially when they are playing.
Once you upgrade to the point of having multiple microphones, you can maximize the presence of the instrument and your voice simultaneously, but that is a topic for another day.
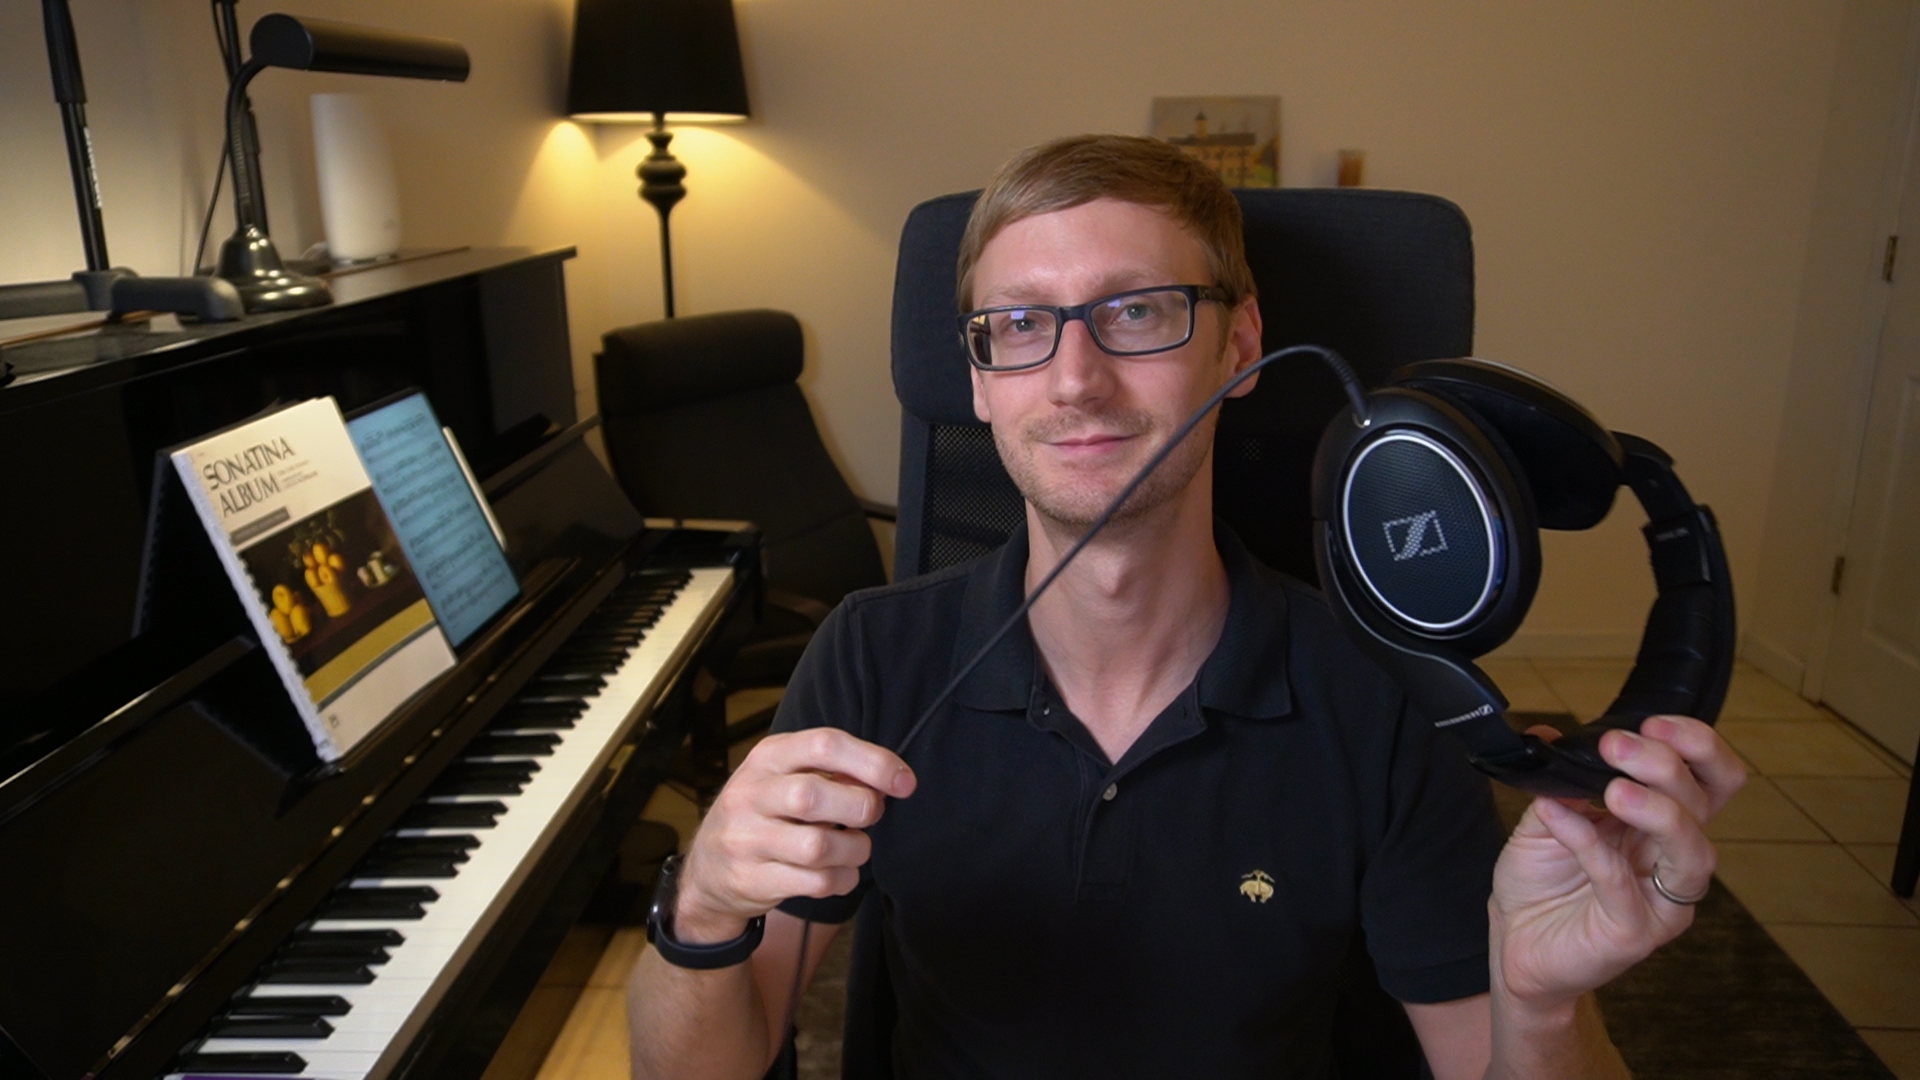
An Optional, but Very Helpful Upgrade
One type of very helpful upgrade that most people don't consider is the use of headphones during lessons, specifically the open-back style. I recommend all students and teachers to wear open-back headphones for lessons.
Questions to Consider:
Are your laptop speakers too quiet?
Do you have trouble engaging with the lesson?
Are you willing to wear headphones?
Do you intend to ever create any online content?
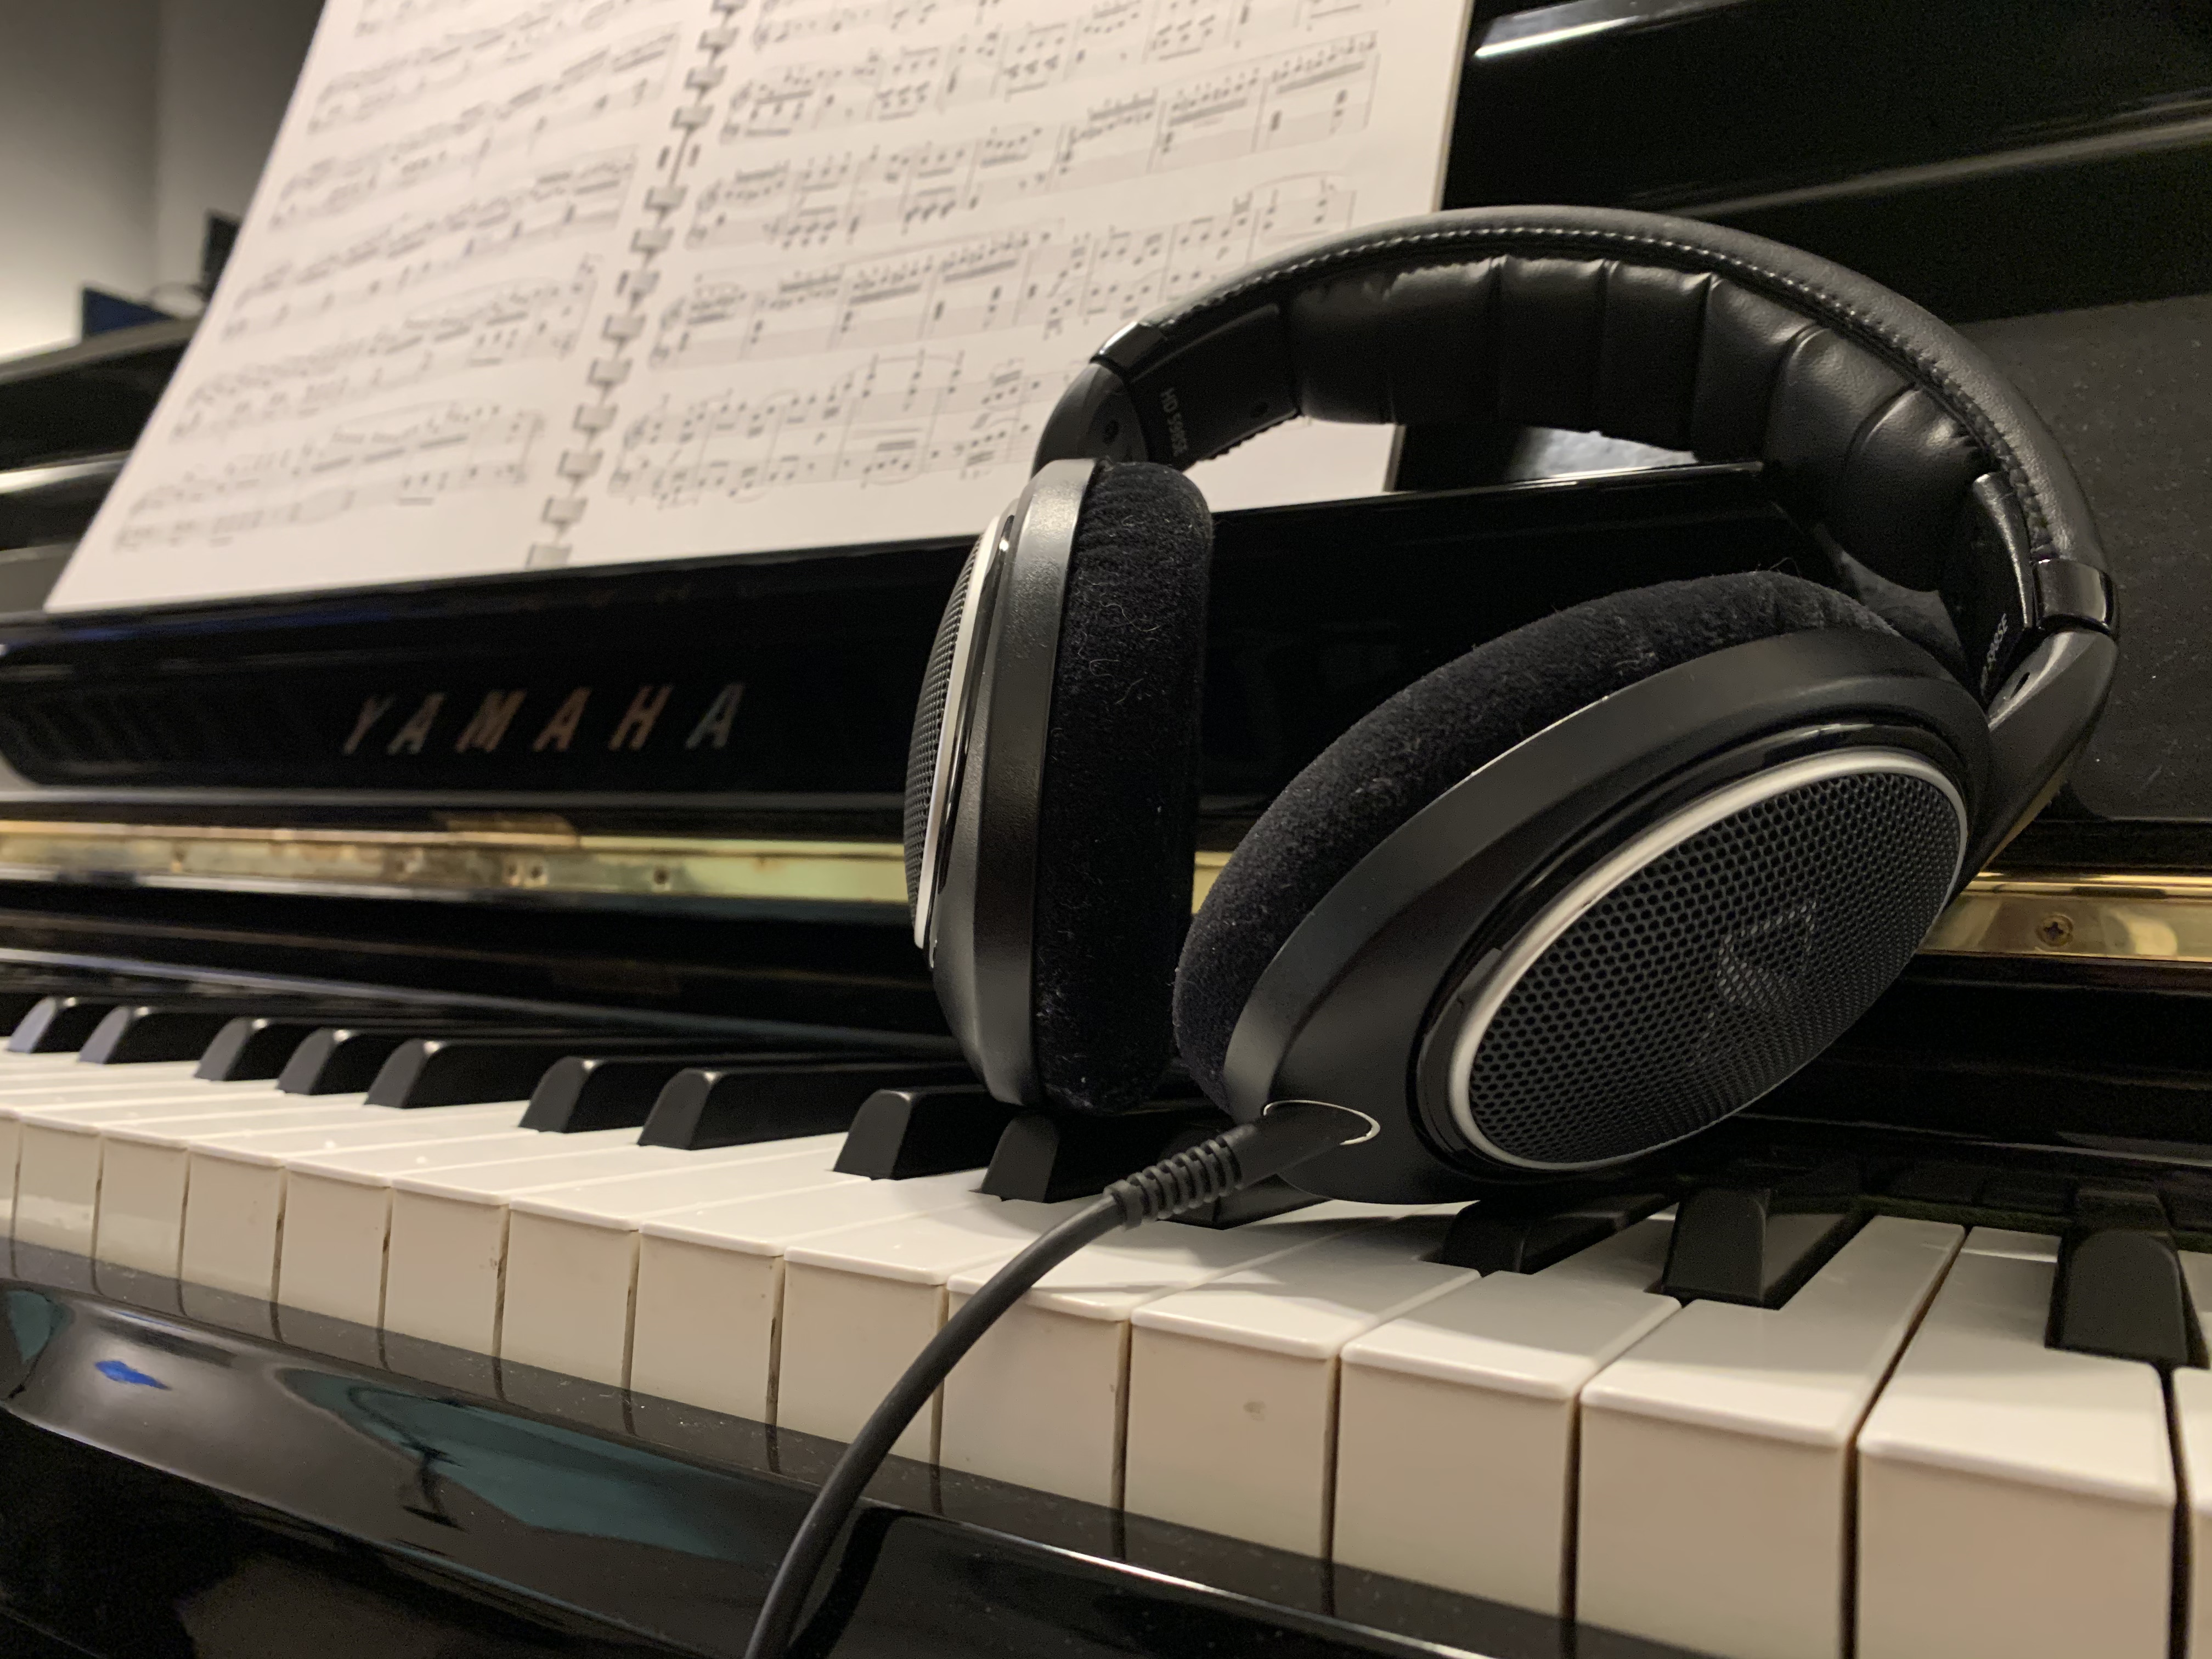
Headphones are one of the best online teaching investments!
Headphones in general offer you significantly more detail when listening to all types of content. While this is helpful in lessons, it will also help you evaluate student recordings, professional recordings, and even your own marketing content. The sound that I experience through my headphones during Zoom call (with the fancy audio options enabled) is really quite impressive.
Open-back headphones are open to the sound in the room and do not seal off your ears. This grants you all the benefits of headphones while still hearing yourself play and speak. Open-back headphones are usually very comfortable to wear for long hours, and you will often forget you are wearing them.
Additionally, headphones isolate the sound of the other participant from the microphone, eliminating feedback loops, and echo cancellation issues. This allows you to disable echo cancellation (in Zoom and other applications that support this).
The practical effect of using headphones during lessons is that participants will hear more details and have the freedom to set their volume as loud as they like. The conversation will also flow back and forth the most naturally.
I strongly recommend all teachers and students consider this upgrade to their setups, as the improved value is significant.
Simple is Best in the Beginning
I want to strongly emphasize that teachers should focus on teaching well before they go crazy with the online setups. Even my setup might seem complicated, but it I designed it to be as simple to use as possible. I don't want to be messing around with technology during lessons, as it breaks the immersion and detracts from your teaching and ability to engage your student.
Questions to Consider:
Do you really need multiple camera views?
Are the onboard mic and cameras from your device sufficient to get started?
Are you considering the onboard camera and mic quality when choosing a potential upgrade?
This simple set up can be surprisingly effective.
The most important thing to keep in mind, especially in the beginning, is that you must be an effective teacher first, assuming you have a basic teaching device and a strong reliable internet connection.
It takes practice to comfortably switch cameras seamlessly during a lesson. Even powering up your device and setting up for a day of teaching takes some getting used to.
Additionally, many of your teaching strategies need to be adapted for online use. Simultaneous interaction turns into a back and forth series of demonstrations. This also takes some getting used to.
I really want to emphasize that you should start small and manageable and focus on engaging your students. As you become more comfortable, you will also discover what types of upgrades are actually needed, and you can begin improving things one item at a time.
If you have a strong internet connection, and a reliable computer and an appropriate place to mount/support it, you are good to go as far as the basics are concerned.
Recommended Upgrade Path
Considering my strong recommendation of keeping it simple, you still may wish to learn about what potential upgrades exist and how they may be best prioritized. If you wish to begin with the end in mind, I wanted to offer you a possible upgrade prioritization list for your consideration. These types of items are listed in order of the amount of improvement for the cost, based on my experience.
Things to Keep in Mind:
Tablets with mobile operating systems (such as the iPad) cannot make use of many external components.
If you have a recent model device, you or your students may not be able to tell the difference in quality of the microphone, but the location of the microphone will be very obvious.
The difference between stereo vs mono for lessons and content creation is rather significant.
If you use Zoom and want to create a stereo setup, you should know that students who use iPads will still hear you in mono.
If you will be doing some content creation for marketing purposes, much of this equipment is necessary.
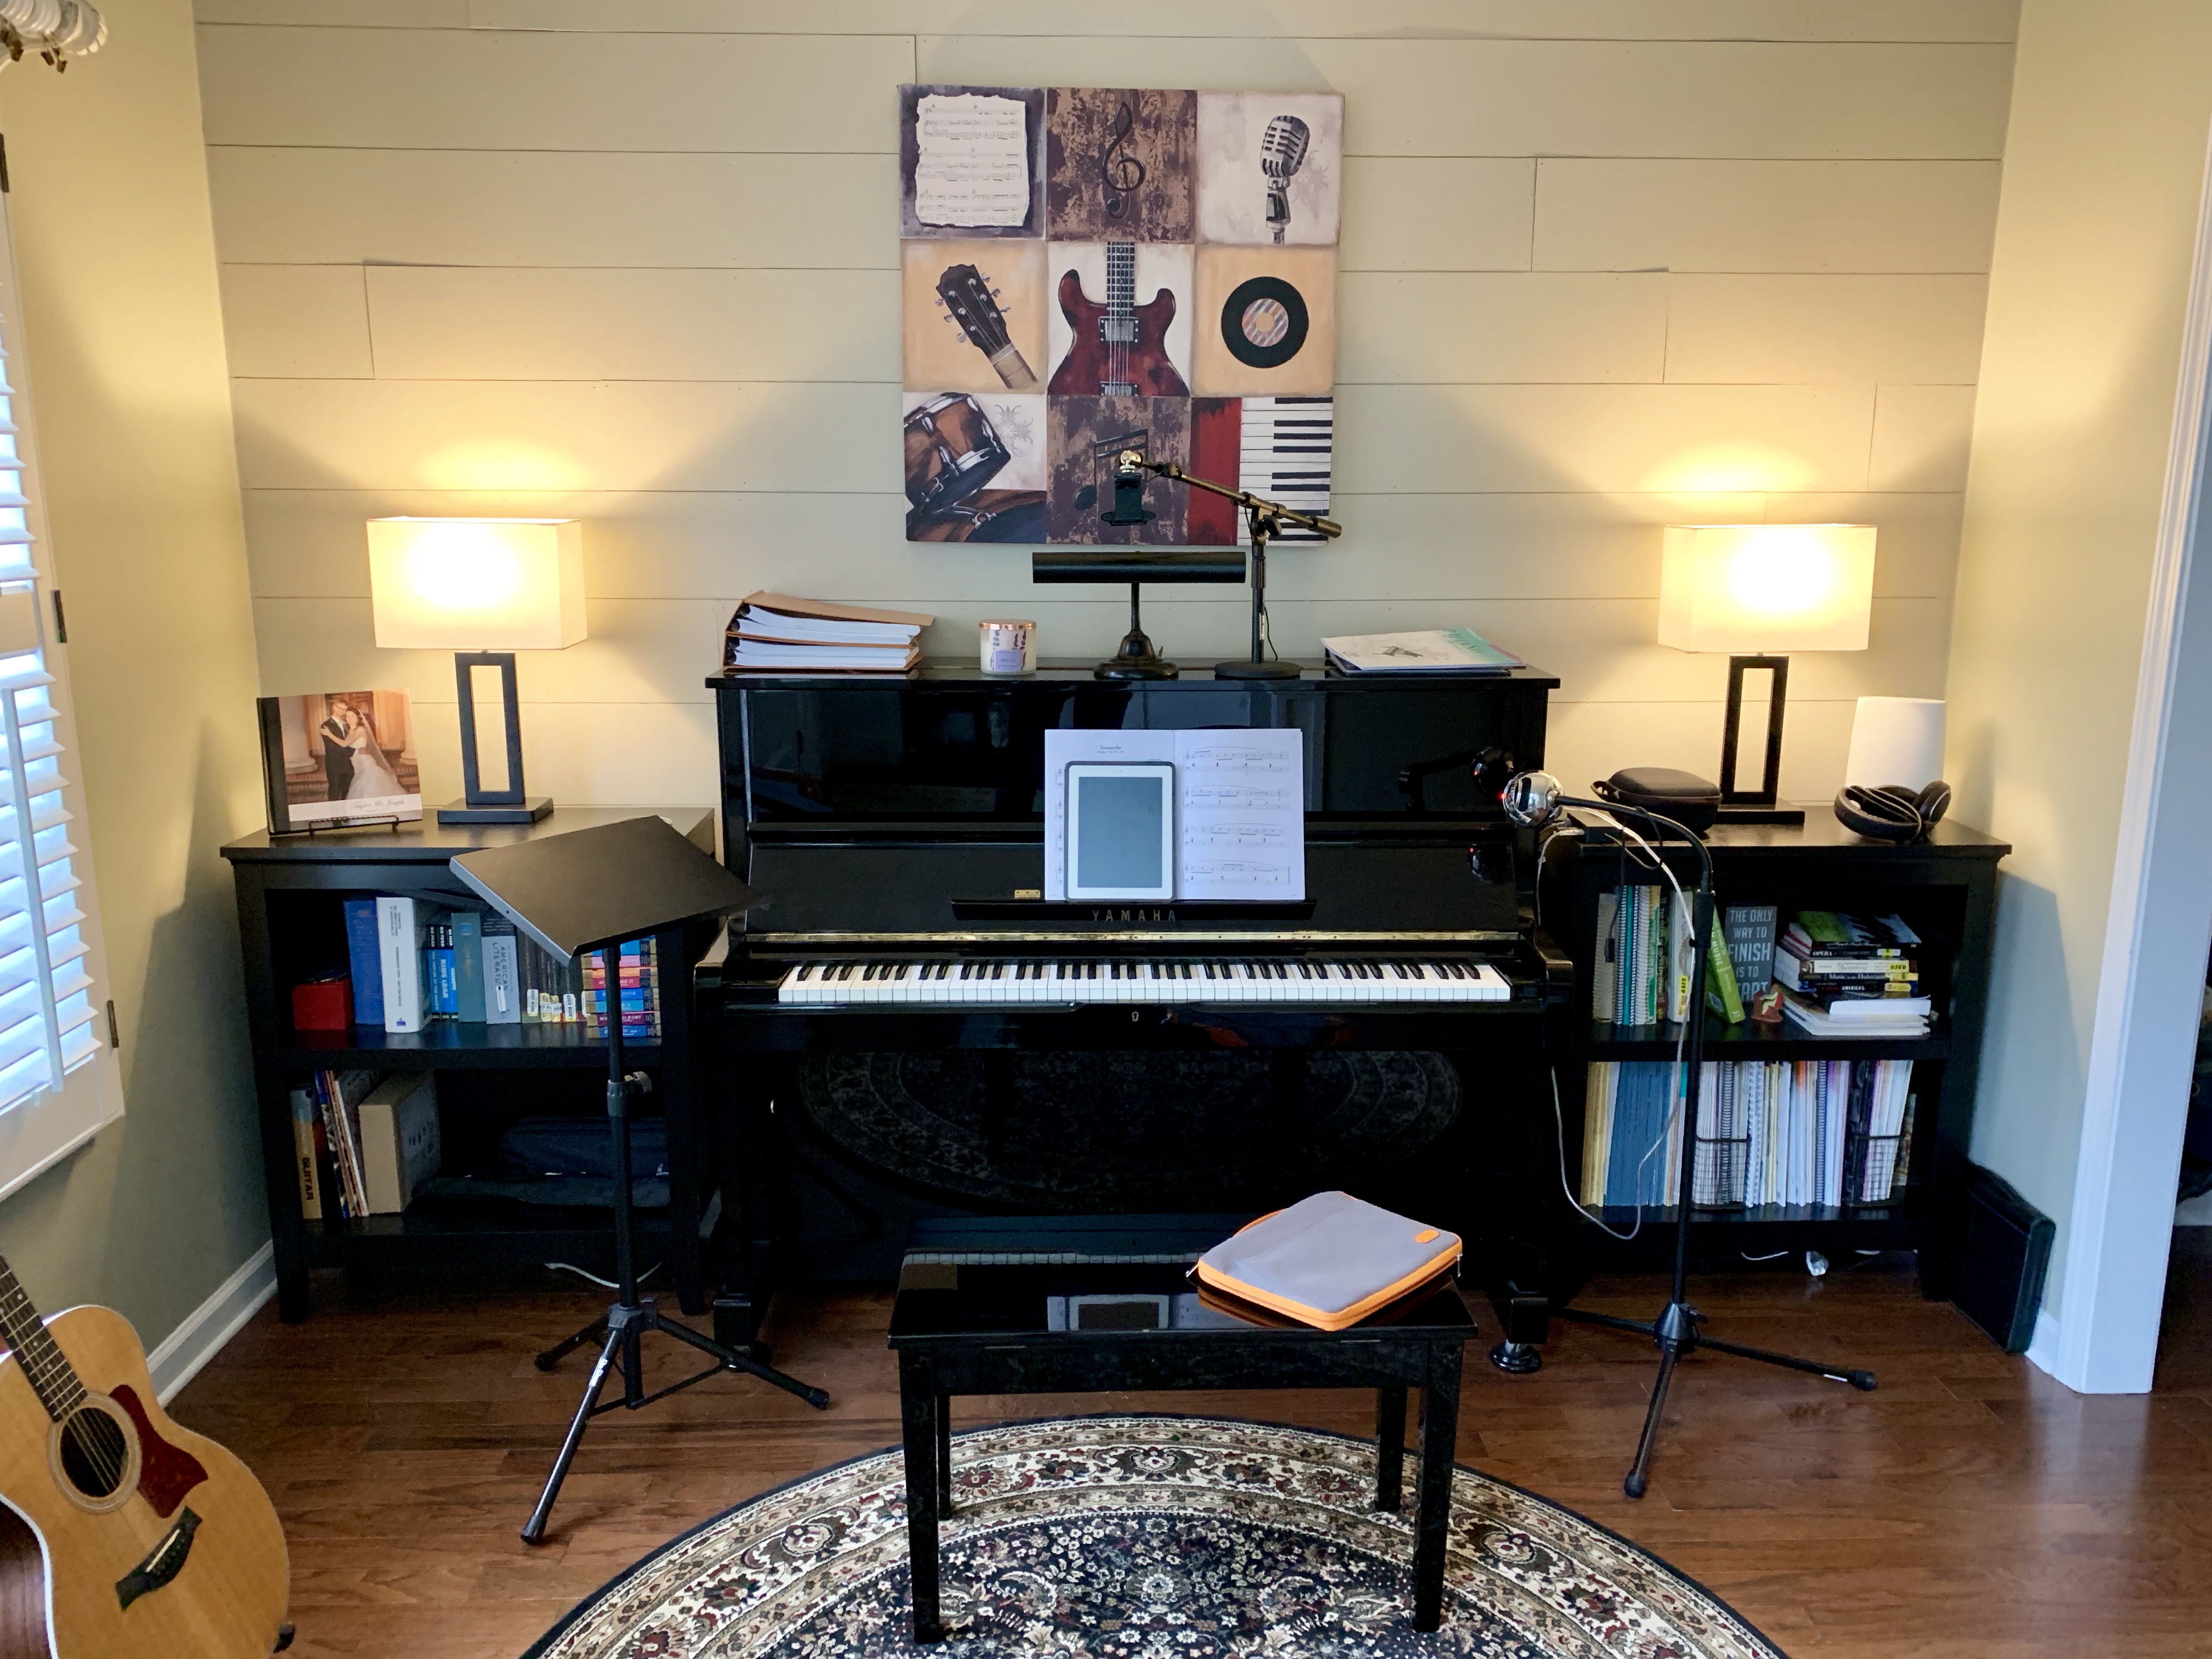
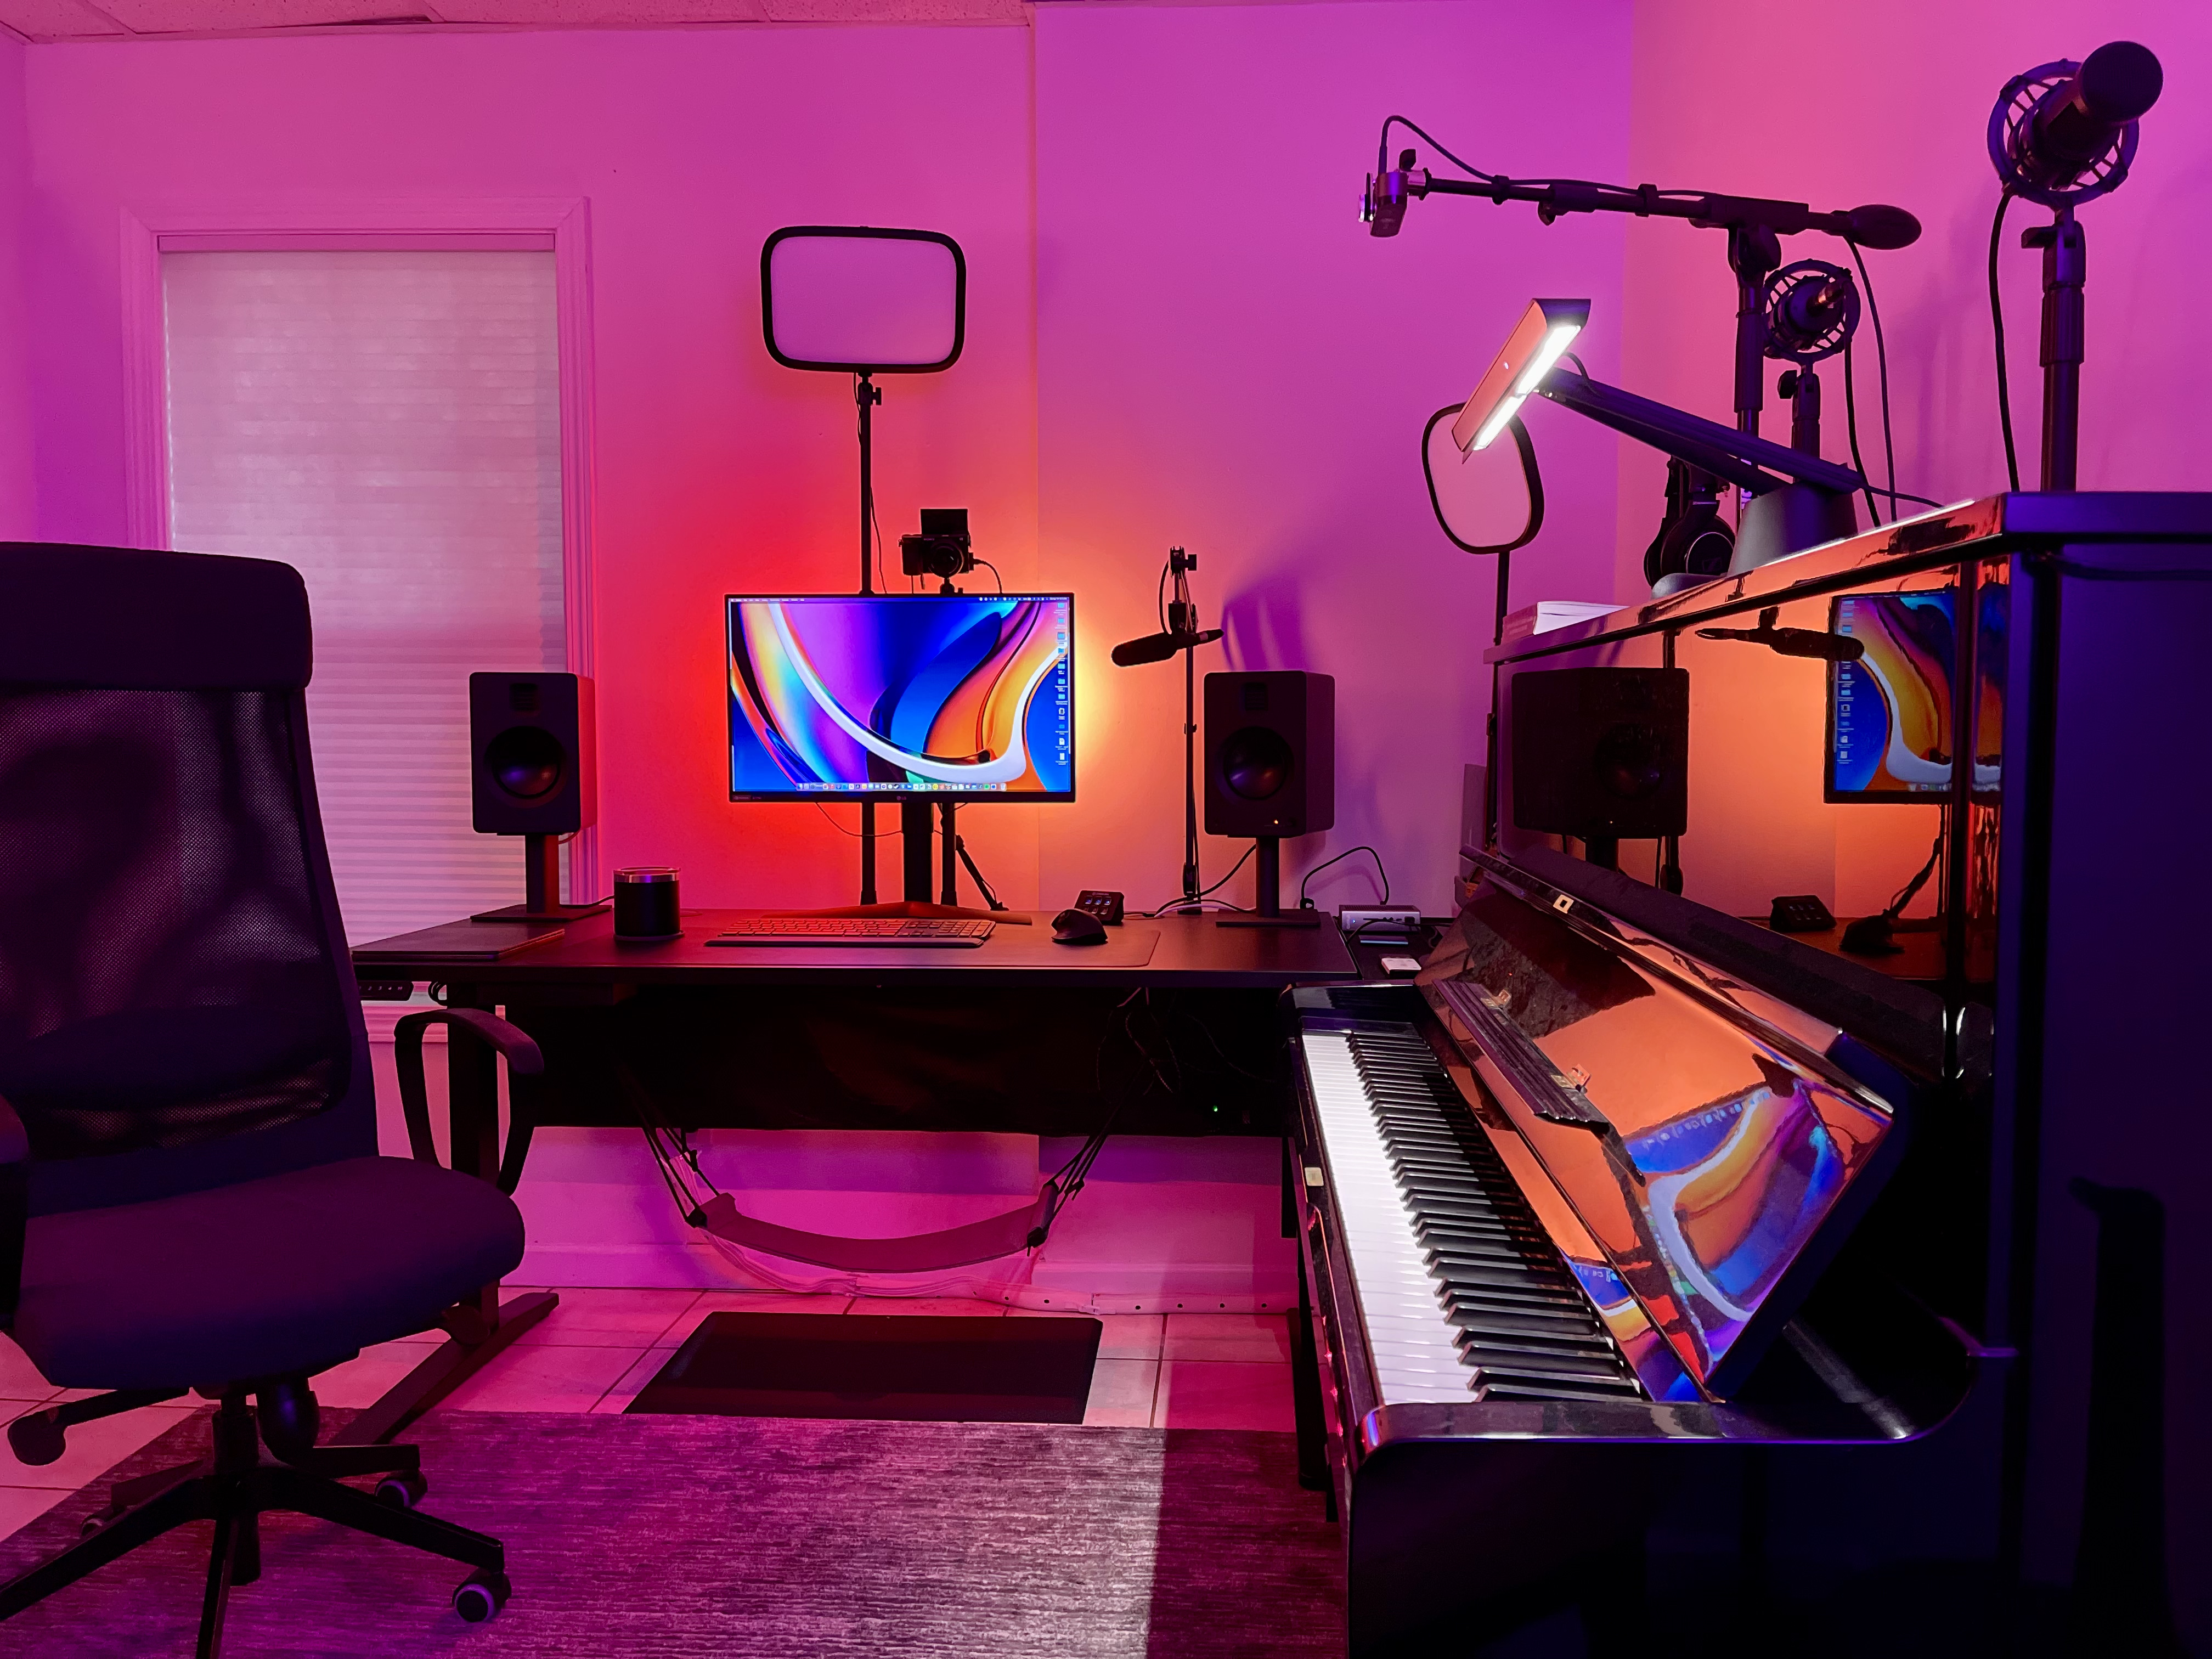
This setup features a key light, second monitor, multiple cameras, headphones, and an external microphone.

Here is a possible upgrade path for you to consider:
This list assumes that you already have a reliable computer and a strong internet connection.
Open-back headphones - the improved quality of life that this one upgrade offers cannot be overstated.
External microphone - An external microphone allows freedom in positioning in addition to improving sound quality. External mics should be positioned in such a way to prioritize your voice over your instrument. Desktop Zoom users should invest in stereo mics (such as the Blue Yeti or Zoom H1 or better).
Quality of life upgrades - This includes anything your studio needs to make your environment more comfortable to teach in for long hours, such as a proper chair or other accessories. These things make a noticeable difference in how enjoyable teaching can be over the long term.
Key light - this describes the type of light used to light a subject for video or photography. This will make your image quality substantially better and often has a greater effect than upgrading your main camera. I would recommend a dimmable LED panel with a soft box or some large diffused light. However, you can also use a lamp placed just out of frame.
Second camera offering alternative view - I use an overhead webcam since I teach piano. Many student's find this very helpful.
Main camera upgrade - You could upgrade your main camera to a high end webcam or even a mirrorless/DSLR camera and create a more detailed looking image.
Additional lighting - This helps create a professional look and assists with marketing content.
This is an external microphone, which is pretty high up on the list.
This was my first overhead webcam setup (click here to learn how to set this up):
This is just an example, and this does not consider the upgrades one would need to create a desktop based setup such as the one I use. I hope this list serves you well when considering possible upgrades.
In Conclusion
While there are many things to consider when preparing to offer online lessons, your main focus should be on your internet strength and reliability, as well as your primary teaching device. Everything else is just peripheral and can be dealt with later.
You should aim to keep your setup simple, and try to use what you already have. You may find that you need very few purchases to be up and running.
Here is another setup example that was used after a few years of online teaching:
When considering upgrades, you need to weigh your options carefully and change as few things at a time as possible. The opportunity to waste money here is vast. Prioritize what you need over what you would like to have.
Many upgrades that seem like they will make a substantial difference might not even be noticed by your students. For example, the difference between a mid tier microphone and a very expensive microphone running in mono mode will likely not be noticed.
Additionally, purchasing things out of order creates an opportunity to waste money. Your new webcam may make a marginal difference if you lack a key light or your teaching area is dimly lit, for example. You would be surprised at how bright your environment needs to be to look good on camera, unless you really shell out for the camera.
Begin with the end in mind.
With strong internet and a basic setup utilizing modern hardware, online lessons can be an effective substitute for most onsite lesson situations. Once you have the technology aspect locked in, your next focus should be on adapting your teaching strategies for online use, and developing comfort and proficiency with teaching students online. As always, practice makes perfect.
Here is another recent setup complete with fancy lighting:
Whats Going on in Your Studio?
After you establish your initial lesson setup, you should take a moment to evaluate the state of things in your studio. Here are a few questions to ponder:
Are you happy with how things are turning out in your studios?
Are there technical challenges you still face?
Are you satisfied with the value that your lessons offer to students?
Are you comfortable managing your studios online?
Do you see online teaching as a sustainable endeavor?
Have you expanded your offerings to other locations yet?
I am a member of various teacher communities, and I often see one of two types of posts. There are the posts where teachers can’t wait to return to in-person learning and they feel that online lessons are totally ridiculous as a concept, and we are just doing them right now because we have to.
Alternatively, there are those who have discovered a new passion in life. While acknowledging some of the drawbacks of online lessons, many teachers have learned to appreciate all the time saving and convenient benefits of online lessons. Some have even discovered how to use this medium to become more effective teachers. This mindset really resonates with me and I want to help more teachers discover it.
Music Teacher Resources
I love teaching online, and I am quite happy with the state of my studio and online presence. I would like for you to be equally satisfied with your own studio, and I believe I can help you achieve that! If you have questions, use the chat feature to reach out to me.
Also, know that I offer a free community membership for music teachers with the optional benefit of making extra money on the side through my affiliate program. You can also see what equipment I use or book a 1:1 consultation with me. You'll find all of this and more by visiting this page.